
This week in thoughts: FINALLY tackling the primary bedroom (plans & processes.)

We have *finally* started our primary bedroom makeover and when I say I’m thrilled? I mean I. am. THRILLED. (with ALL the CAPITALS.)
Having now lived in a total of four homes with my husband, and more recently our daughter and dog, I can say without hesitation that in every single house, our bedroom has been at the bottom of the renovation pile.
It’s weird because I love a beautiful bedroom, I just seem to forget how important a restful space; especially for slumber, actually is. That is, until months have passed and I am lay in bed staring at the artexed ceiling and wallpapered feature wall; wondering why I keep relegating it to last place.
A functioning bedroom is crucial for promoting restful sleep and for enhancing mental and emotional wellbeing. However you choose to decorate it, I think we can all agree a bedroom that feels relaxing and calm is more likely to result in a good night’s kip than one that it is chaotic, or in our case, hasn’t been touched since we moved in.
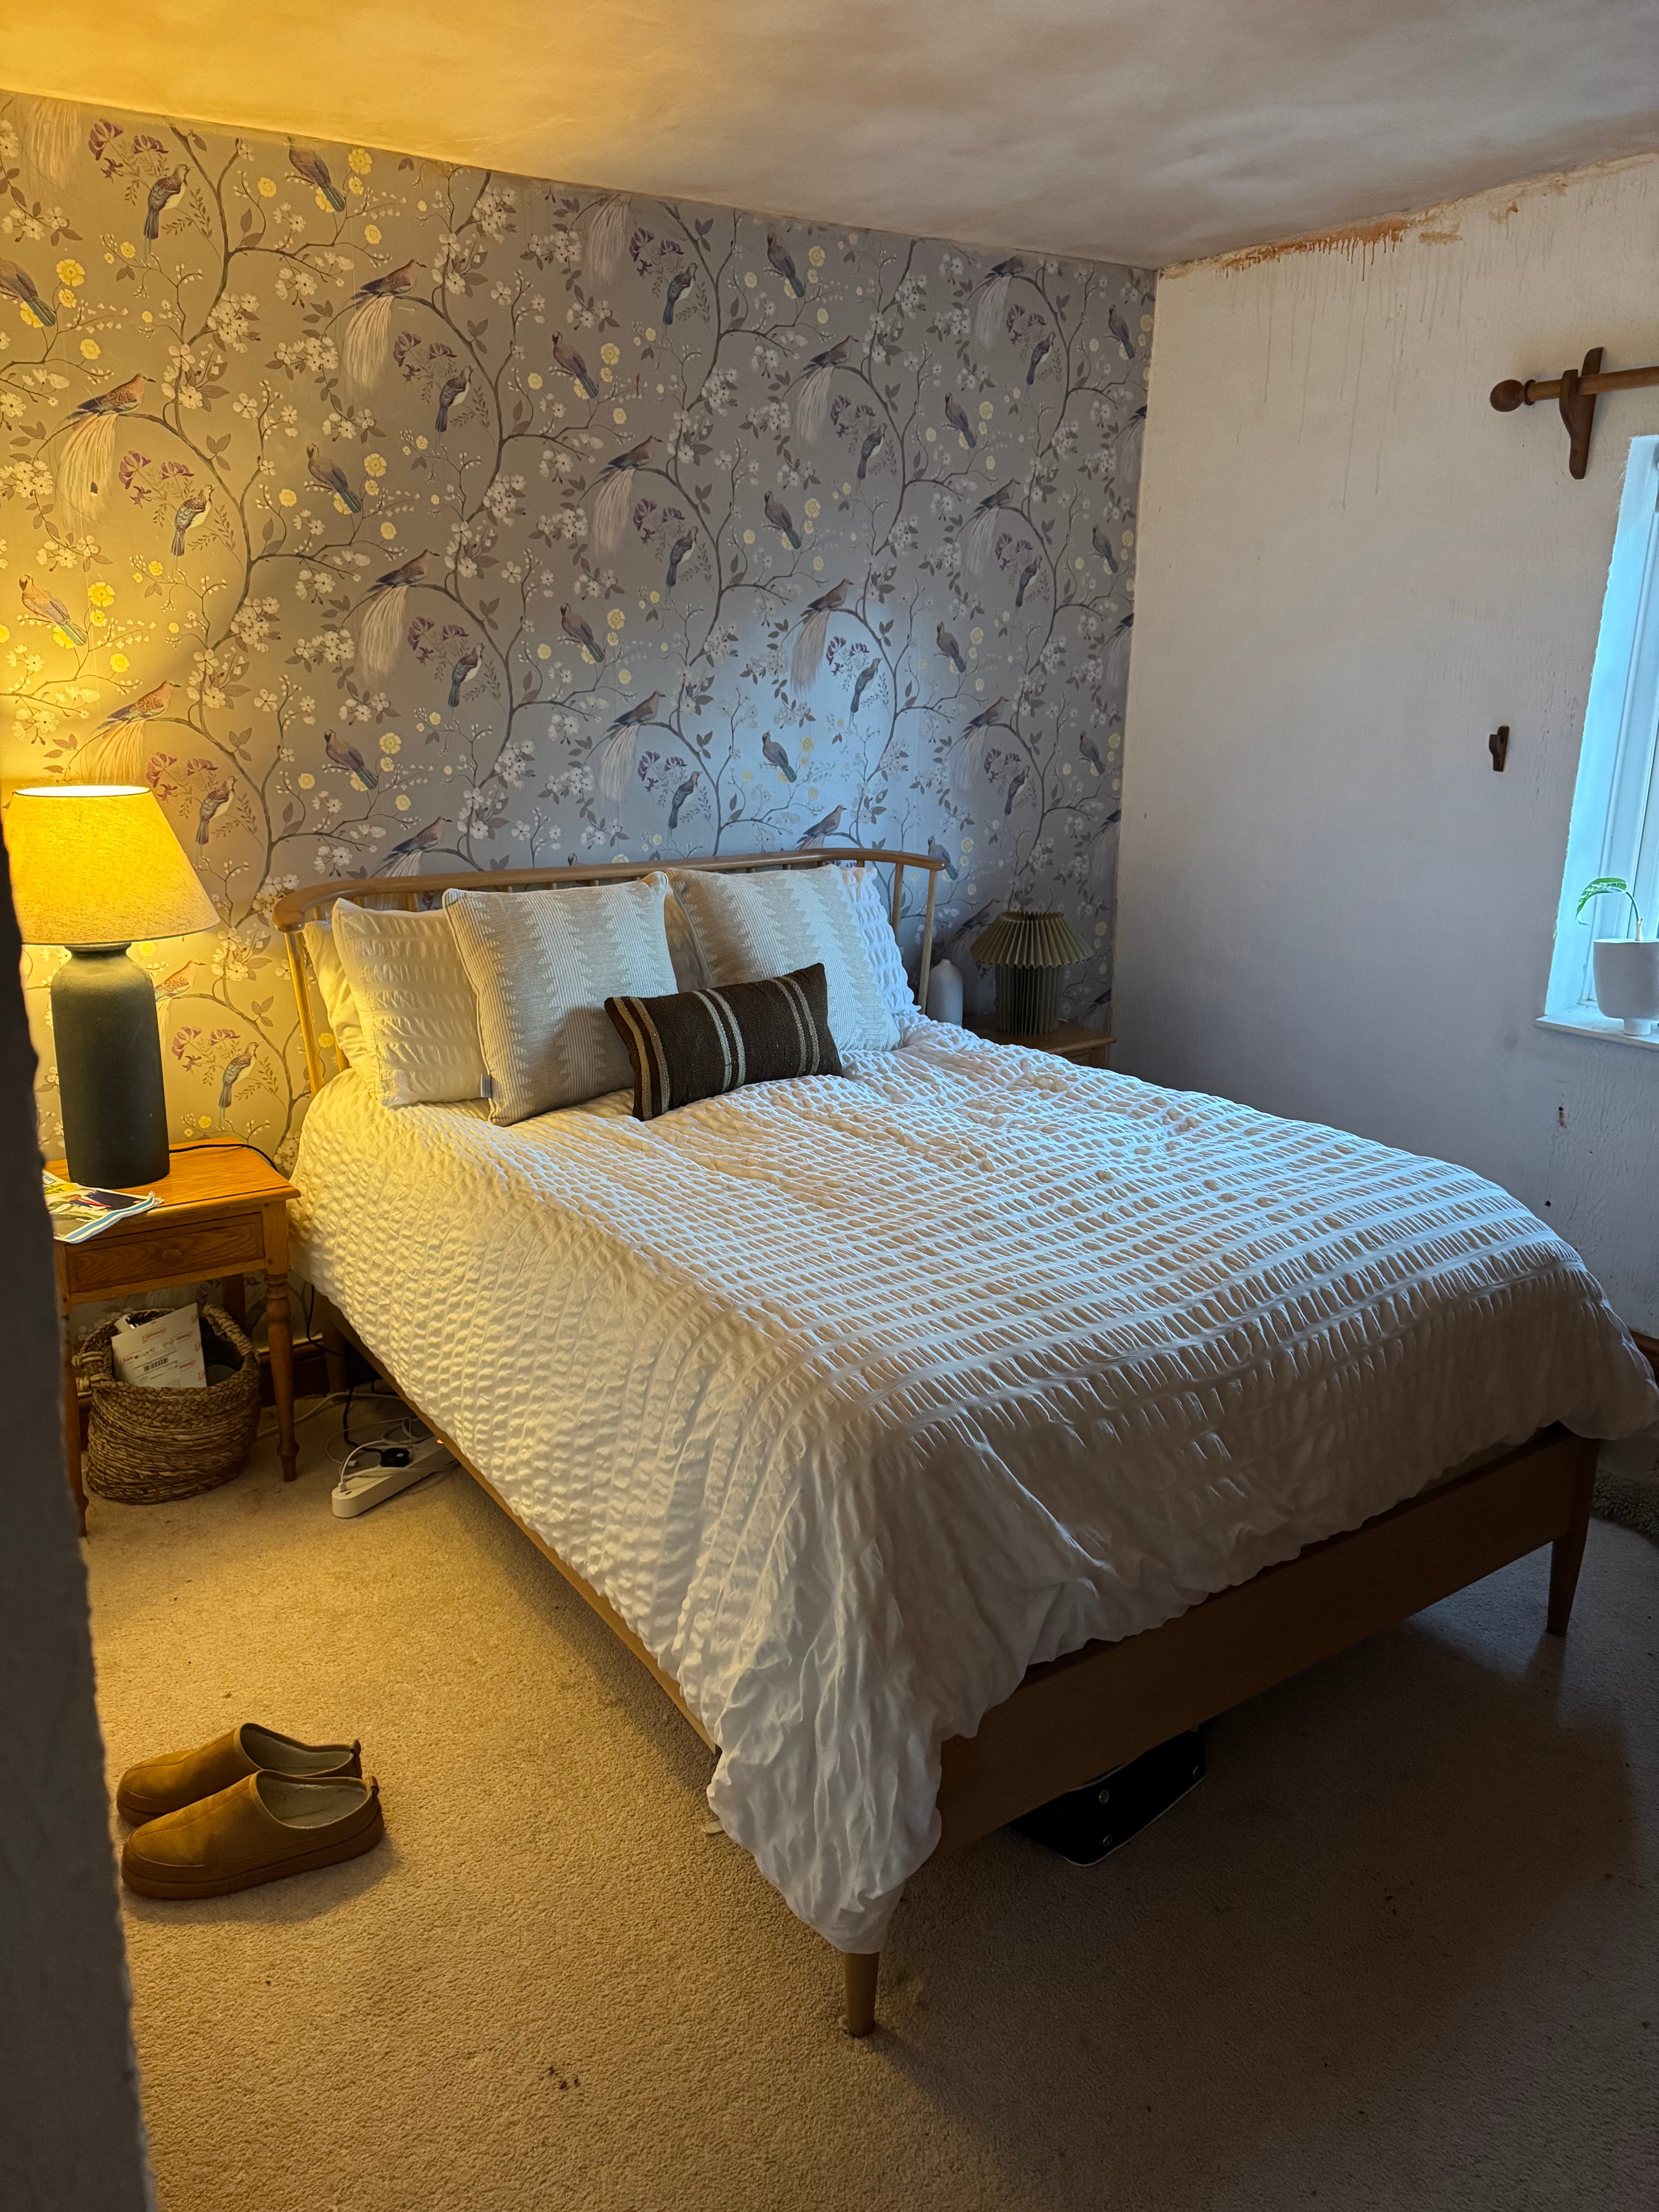
As you can see from the pic; we haven’t done anything to this room yet, bar having the ceiling skimmed earlier on in the year. It’s quite a featureless space, which is a shame as most of the other rooms within the house have some character. The previous owners chose to install a bird patterned, metallic-y wallpaper, which isn’t to my taste plus, the carpet (I’m not a carpet fan at the best of times) is old, and has seen better days.
The room is presently and essentially; an uninspired box.
The problem is that it doesn’t say cottage to me when I enter it, but rather; neglected dumping ground that nobody wants to own up to. Not the vibe I’m going for at all.
Our aim is to inject it with some much needed character, and (hopefully) create a haven where we can *finally* get some good quality rest.
Plans
WALLS, CEILING & FLOOR
We currently have artex on our walls; a common denominator throughout the house. Artex was super popular in the 70s and 80s but has since become vetoed by interior lovers, including me, who prefer the look of a flat wall.
Until 1984, artex coating was made with white asbestos (chrysotile) to strengthen it, however the material is only harmful when in a powder form, such as when being sanded or while drilling holes. It poses no risk while it is undisturbed on ceilings or walls and covered with emulsion paint. When we had the living room plastered for example, we actually opted for a skim (a ‘skim coat’ is a thinner layer of plaster, which is typically applied over existing plaster or drywall.) The existing artex was bonded with a special solution- but you can also use PVA glue. This is the best option if you think there might be asbestos because it negates the need for scraping (which may disrupt the asbestos and release molecules into the air.)
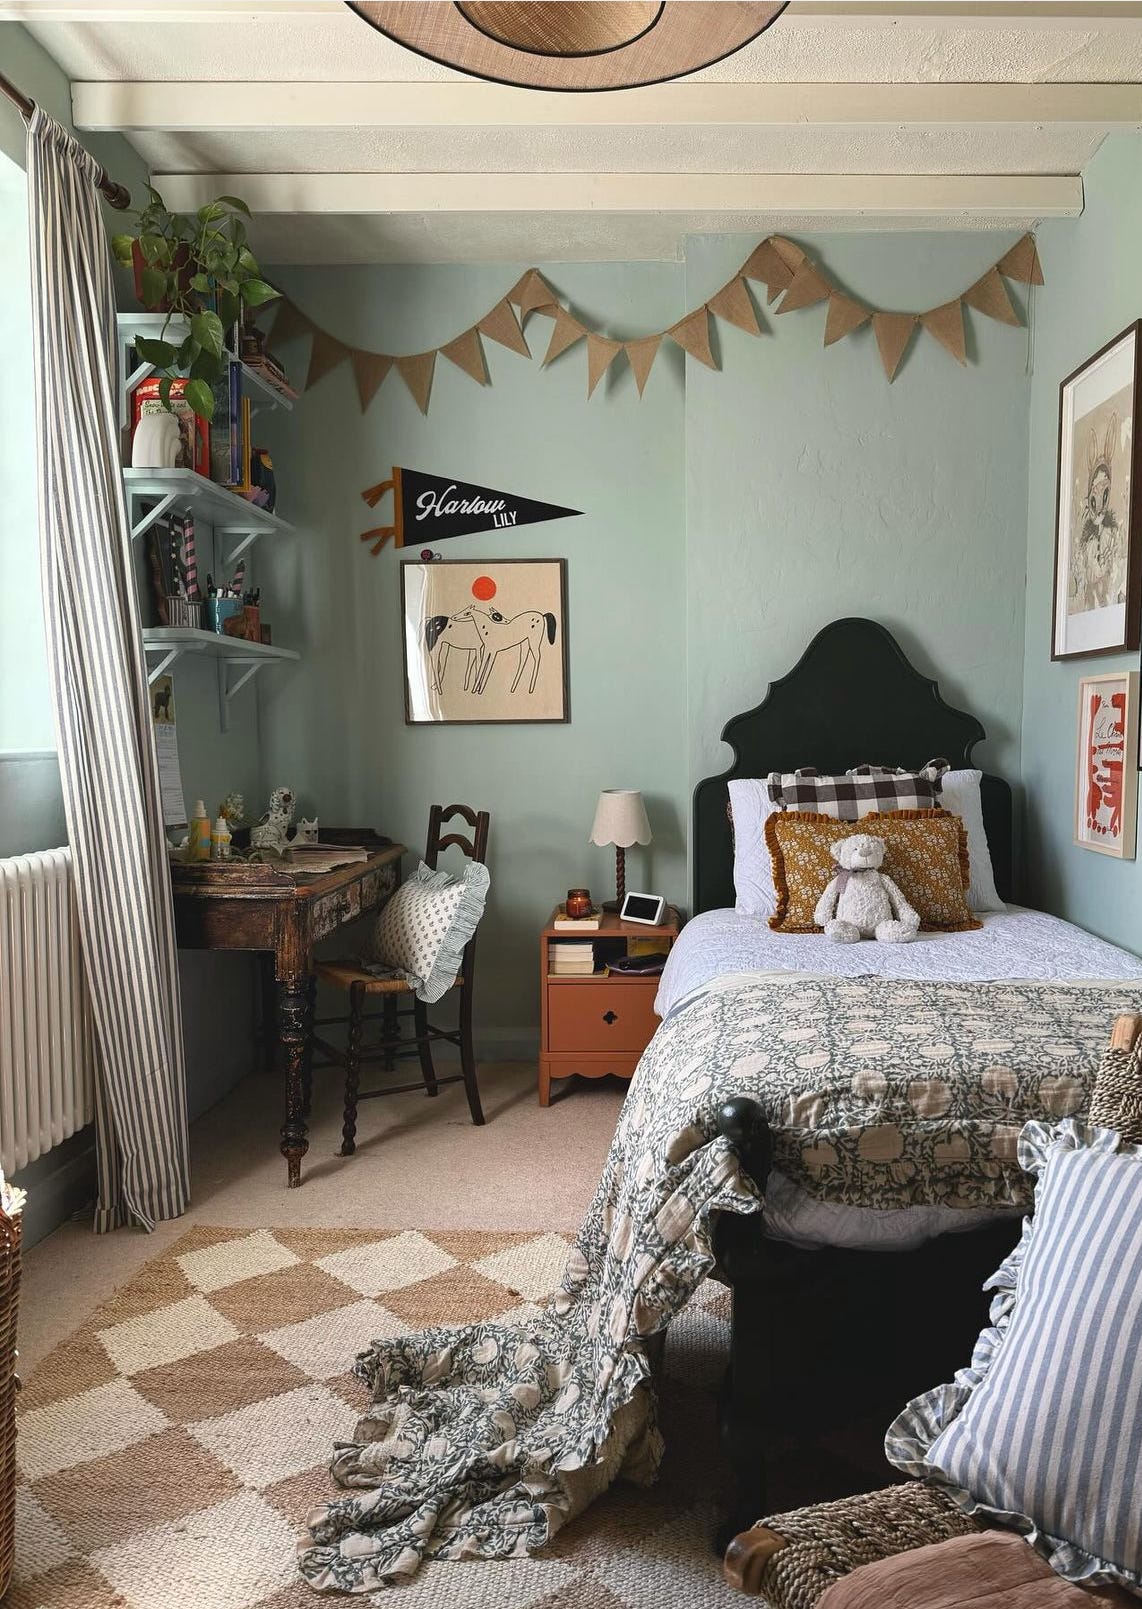
This time round however, I think rather than getting the walls plastered (or skimmed) I am going to cover them in tongue and groove panelling instead. Something a bit like the images below…


Cost wise, it is definitely more expensive than having the walls plastered, but as well as covering over the texture; it will also give us the aesthetic we want and crucially, add in some dimension. There are no period features in the room bar the two doors (which are lovely) and I think the T&G will help to give the room a bit of a historic feel whilst keeping things fresh and modern.
I absolutely adore these images. I have many, many saved over on Pinterest, which are basically identikit in feel- light walls but with real depth and interest, contrasted with darker toned furniture and accessories. It’s kind of beach- meets- moody cottage with a scandi vibe. It is timeless, cosy and understated in my opinion, especially as I will be adding antique furniture. I will be using full height panelling, rather than half height.
We recently ripped up the very tired carpet (one of the best moments of my life-I kid you not) and were delighted to find a set of very well preserved floorboards. Someone at some point had painted them a sort of pea green shade, so we are going to give them a face lift and go for a classic white- hoping that in time, they will gain a nice patina. I really love white floorboards and, unlike other colours, I think they work well with chips and scrapes to the paintwork. White floorboards seem to look even better when they are imperfect.
We opted to get the ceiling plastered; as we’d decided not to take the tongue and groove on to it (although I do think it would also look fantastic all over.) We will however be adding some faux beams -this is a really easy DIY where you essentially attach long pieces of wood to the ceiling (it can be reclaimed wood/rustic or newer strip wood which you can then paint.) I want to replicate what we did in my daughter’s room (we used the living room beams as a guide for width and spacing) and use a lightweight strip wood and then paint them the same shade as the walls. I don’t want to overwhelm the space with a dark ceiling, and also I want my deep oak furniture, and earthier textiles to really stand out.
I am then going to paint the ceiling, beams and floor in a ‘true’ white (but not a brilliant white) and walls in very soft, linen-y shade. I had thought of going darker in this space but the more time I’ve spent in the room the more I’ve realised that we need something bright and airy.
FURNITURE
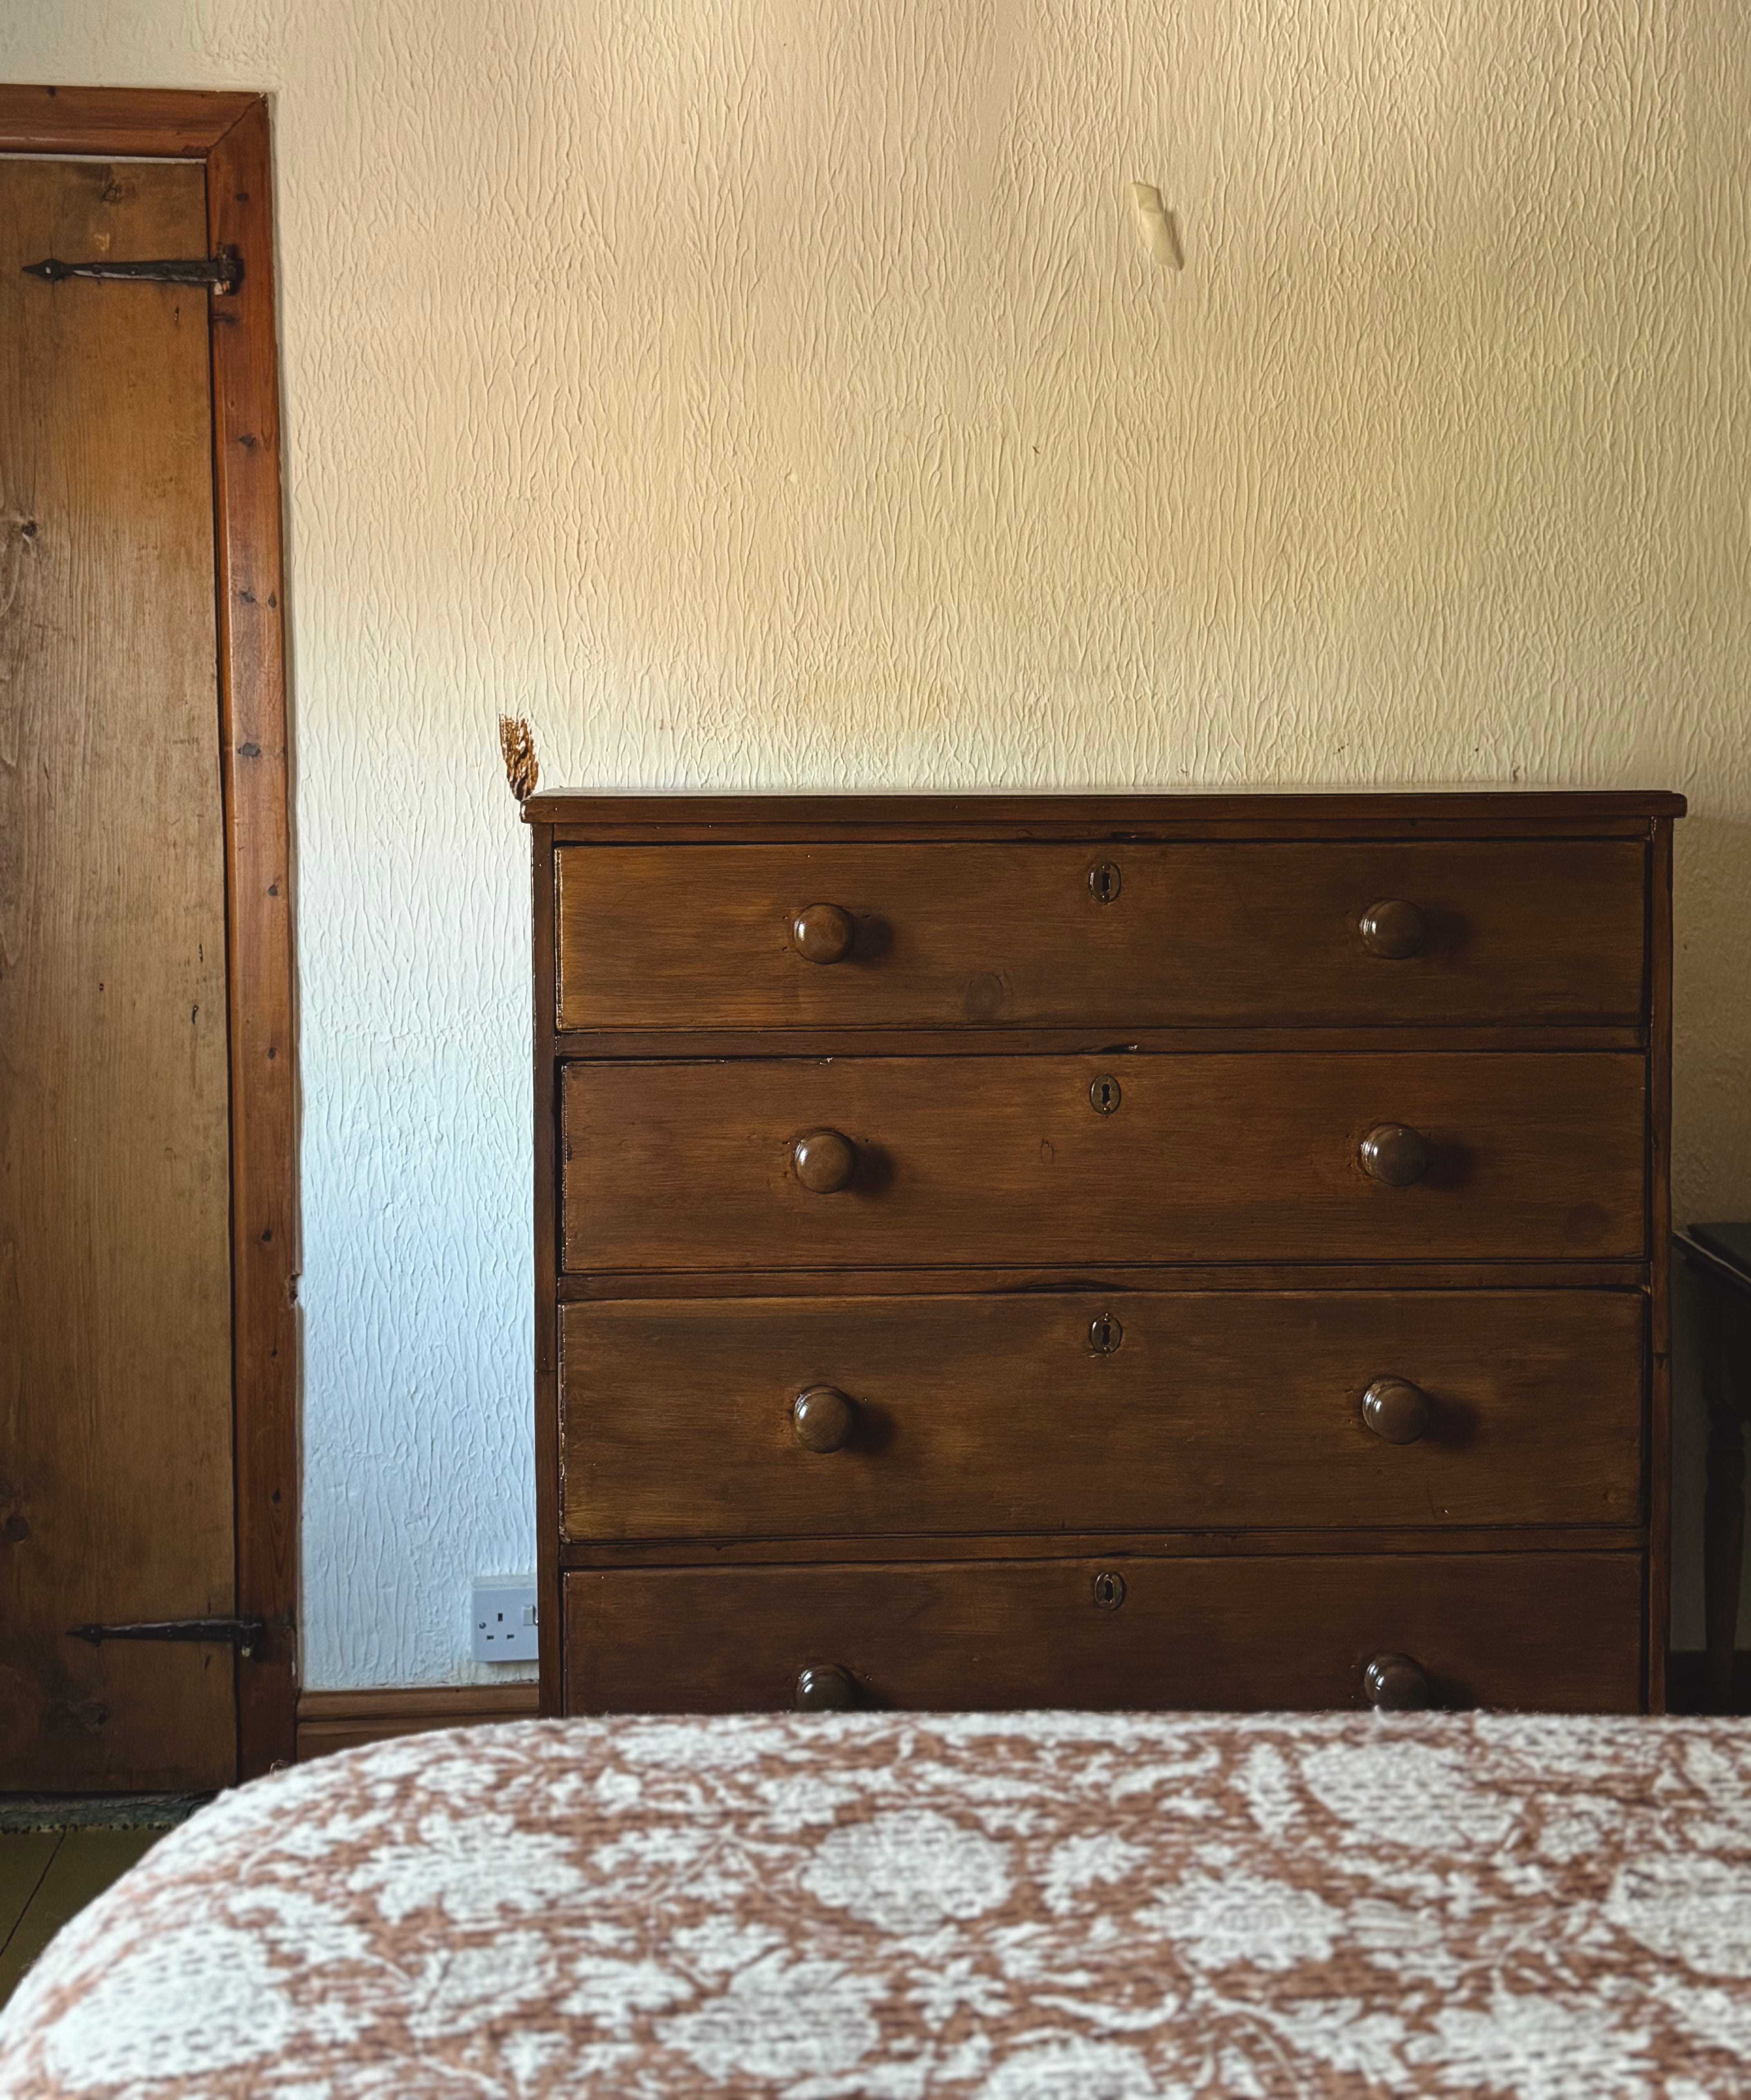
We bought a very old, and well very loved chest of drawers with us when we moved from our old house-it’s a Victorian piece I think; with four chunky drawers and big knobs. I’d previously white waxed it, and to be honest I was thinking of selling it but then I had the idea to stain it darker and save some money instead. I absolutely love it in its new incarnation- plus the stain I used is satin and a much more durable finish (I love the slight sheen.) I’m so glad that I tried an upcycle first! (always best to try and salvage something right? especially when it’s a well made piece.)
We also nabbed some really lovely bedside tables from facebook Marketplace for £30 (for the pair!) and I have given those the same treatment as the chest (I’m going to hold off sharing any pics of these until they are styled, and the room is complete though!)
In terms of the rest of the room, as it’s not a particularly large space, I’m actually going to keep it fairly paired back with a bench, and some wall shelves. Luckily, we have a (small) third bedroom which I currently use as my dressing room. There is a storage cupboard integrated into the bedroom which Terry uses as his wardrobe; It’s a fab addition and it means that thankfully, we don’t need any additional wardrobes in our bedroom-which in truth, I think we would struggle to fit in.
TV AND GALLERY WALL
I know for many of you, a TV in the bedroom is an absolute deal breaker. Known more for pretty as opposed to practical; you maybe reading, thinking, “are you ok?”. I am ok I can assure you. However, my husband and I, as tired parents of a 10 year old, don’t always have the stamina to stay in the living room to watch our favourite series, often wandering up to bed to continue. At the moment we have a TV which is stood perilously on the chest of drawers-my idea is to mount it on the wall and recreate something like in the image below; above our chest and surrounded by artwork.

I would love a frame TV but I don’t know if we can realistically afford one (certainly not new anyway) but I think (hope) we can still get a similar effect even with our slightly less slick TV. You can actually turn any smart TV into a ‘picture’ as long as you have YouTube. Simply search for ‘TV art’ on the app and take your pick. This vintage chanel is a goodie!
In short, I’m NOT not going to have a telly in my bedroom- so I may as well make it pretty. Sorry!


FURNISHINGS
I’ve already started sourcing textiles for the room; despite not having actually finished it yet. I find that when working on a project I have to incorporate at least some ‘nice stuff’ early on as to keep momentum and also because it helps me to plot my vision more clearly. Once I have something tangible and I can see/ feel the fabric etc, I find everything else falls into place- so don’t be put off by thinking a project has be fully finished before making any ‘fun’ purchases first.
I’ve bought two cushions from Homesense (absolute steals), a lumbar pillow from Etsy and a throw blanket. Once I know the palette for a space I don’t find shopping for soft furnishings/ decor etc an arduous task because I am strict with the colours I use. It makes sourcing things so much easier because I have parameters to work within. Too much choice and I end up with decision fatigue. That’s why I like earthy tones *so* much.
The image below is neutrals done right in my opinion, and very similar to the mood we want to create in our own bedroom. There is pattern, but it is confined to the dominant colour of the space- brown. The patterns are mixed, e.g., gingham, a stripe, florals etc but essentially varying shades of the same hue. It never feels too much. It is all at once; balanced, harmonious, calm and serene but not in any way, flat or one dimensional. It is simply perfect.
Also, interestingly, there are also several types/ tones of woods within the room- we have the richer, darker (oak maybe?) of the wardrobe contrasted with the ashy side table. The key I think to mixing woods successfully, is to pick either warm or cool toned furniture. This stops things clashing and keeps the focus on the saturation point of the pieces. I love mixing woods- it’s a an easy way to stop a room from feeling too matchy-matchy (for a really interesting space, we don’t want it to look as though everything was bought from the same shop.)

LIGHTING
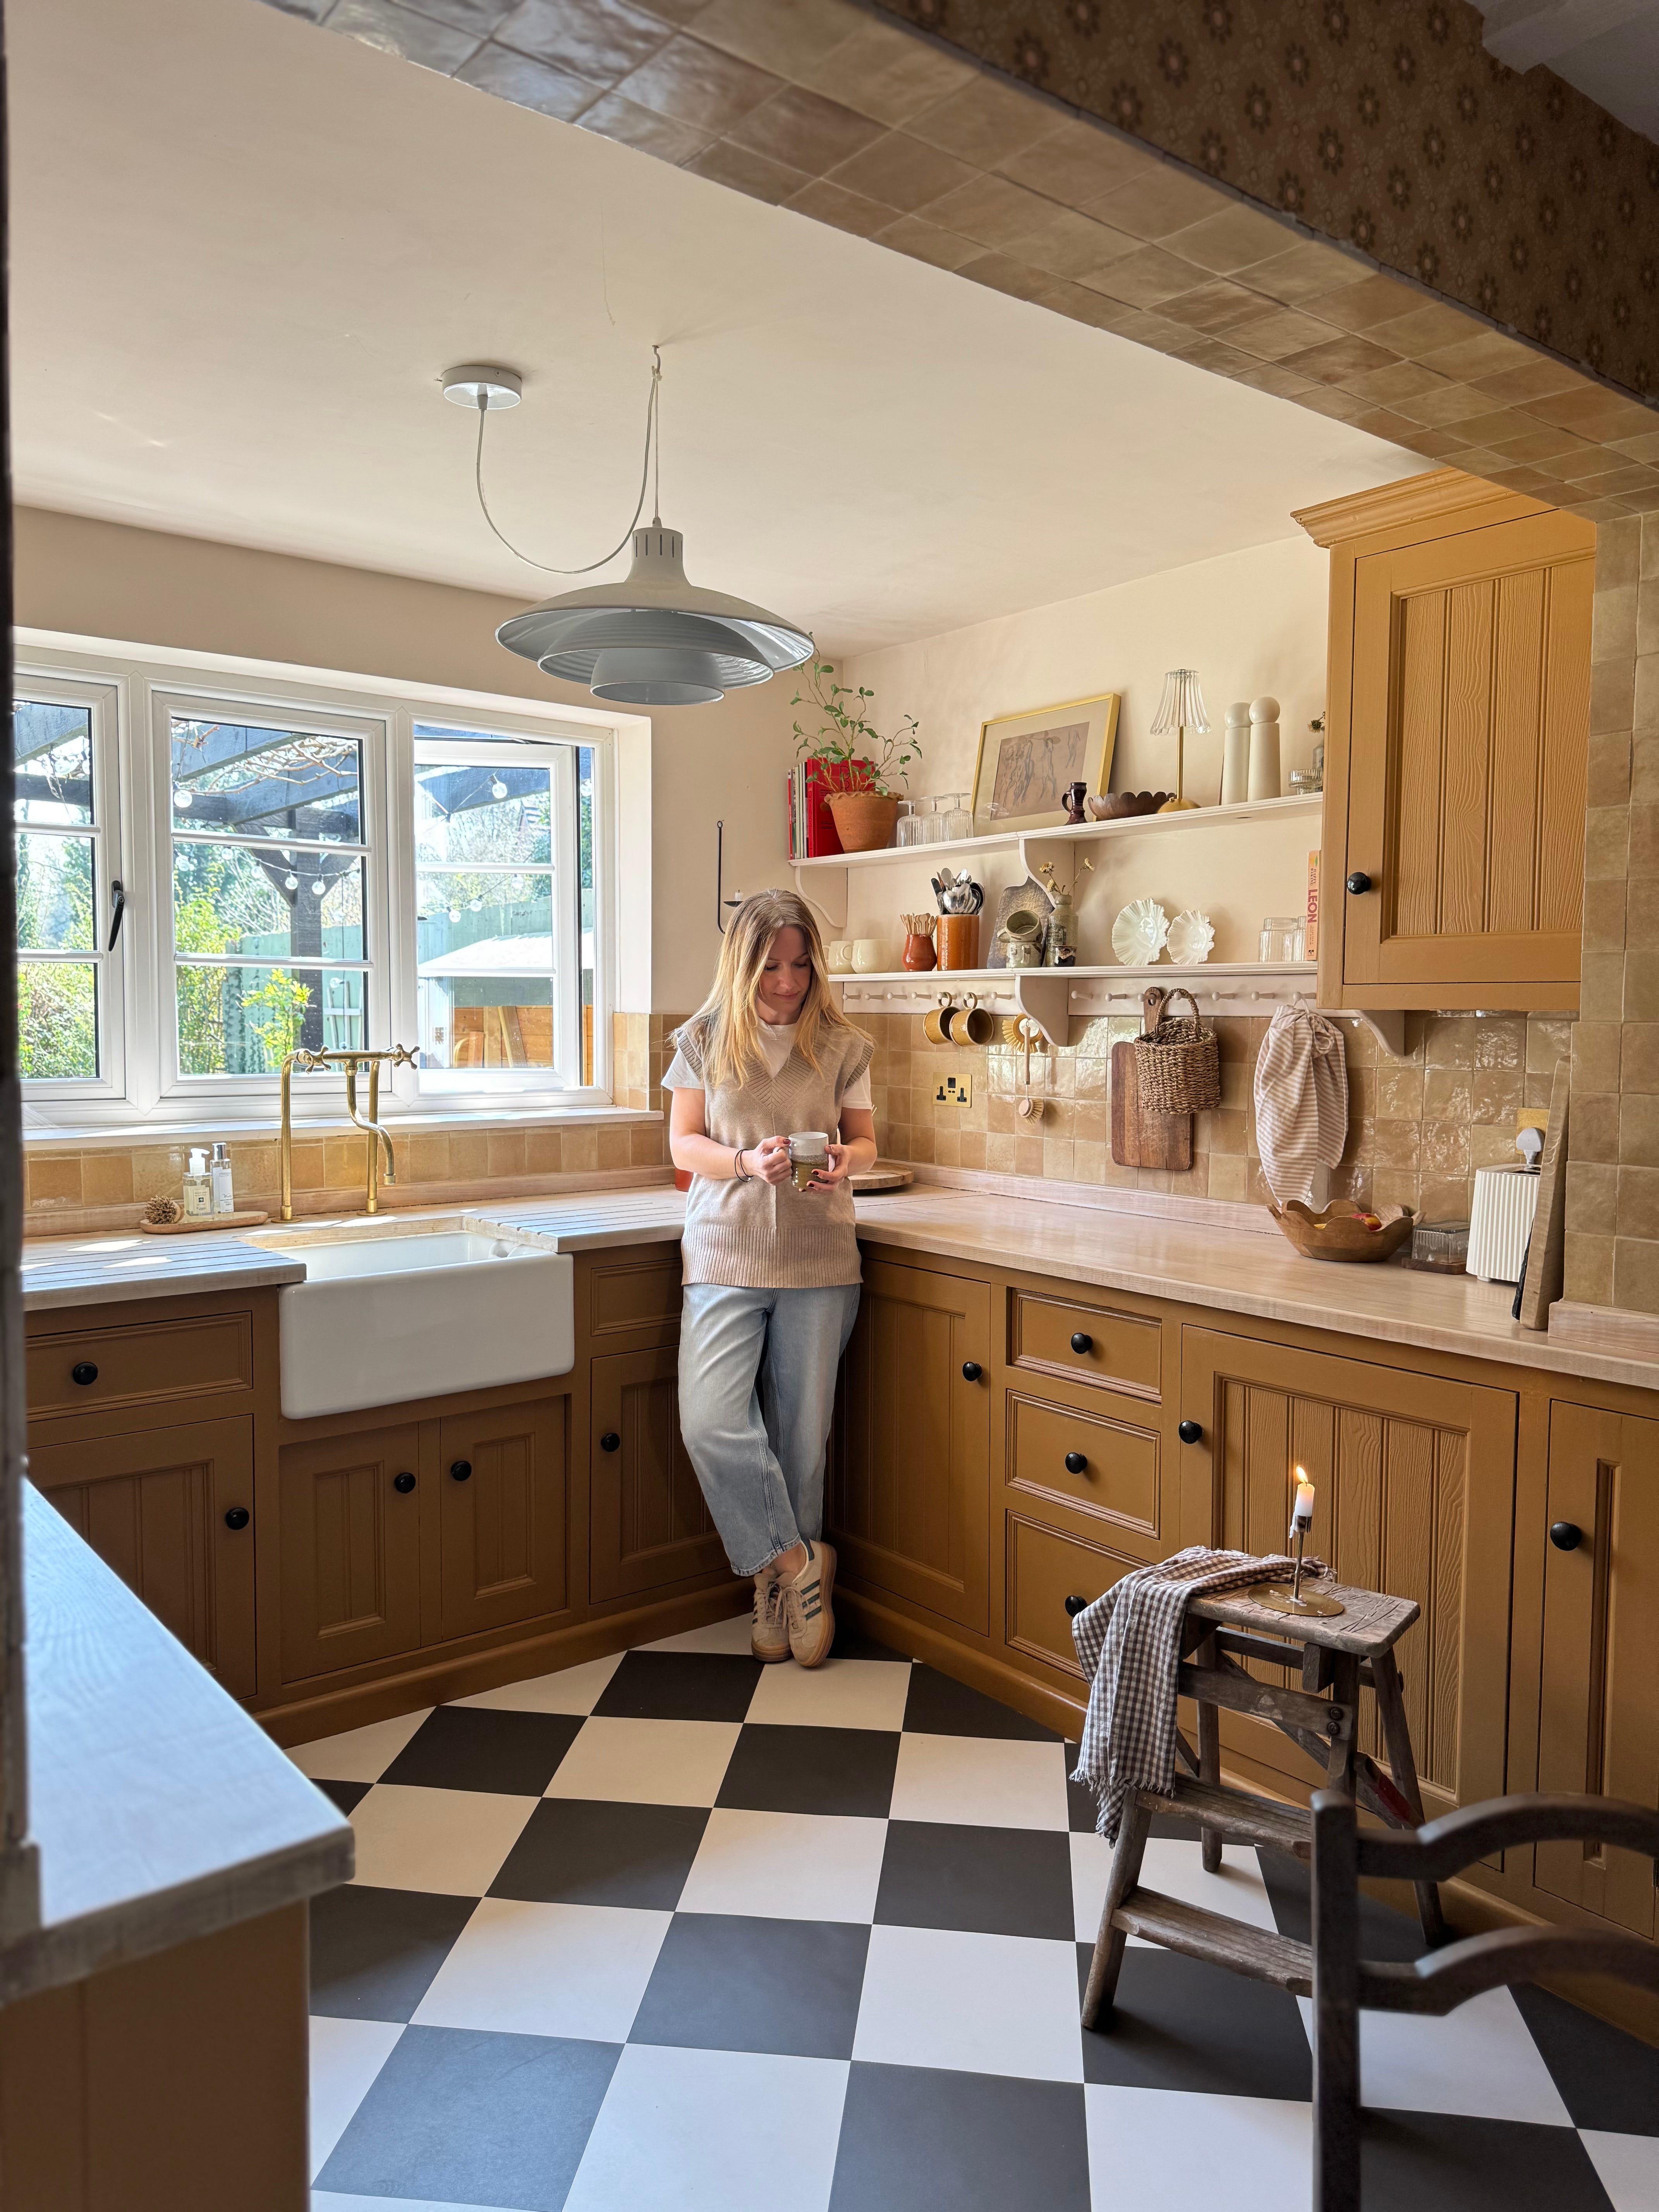
I have already sourced lighting for this room- apart from a couple of table lamps that is. Again, I sort of had an idea in my head of what I wanted- mixed materials (as always) and varying shapes for contrast. I had a bit of money so I just went for it. I think they’re going to look great. One of my favourite tricks for ceiling lights (and something I nearly always do) because I just LOVE the looks of it so much is to hang (get my husband to hang) the cable from a hook. So essentially if you buy a pendant there is usually a rose/cable with it-often they are long enough to do this trick with but if not, I will change the fittings to something that has more length so that I can create that look. You can buy pendant kits separately. I love Creative Cables fo choice.
You can see we’ve done this with our kitchen light in the image below. I think it adds an element of visual interest, but also provides a subtle opportunity to introduce more texture and to customise how high, or low you hang your light.
We are off to Wales next week but will be getting stuck into the project on our return. There won’t be a post from me next week as I am going to take a social media break but I’ll be back on Thursday 17th.
Have a great week!
Nina x
Sounds both exciting and inspiring. I agree, the bedroom needs your personality. Just LOVE your Pinterest style. Makes me want to add beams to my ceiling !!