


This week in thoughts: The living room is almost done, and why I'm suddenly so indecisive.
I think I overthink...

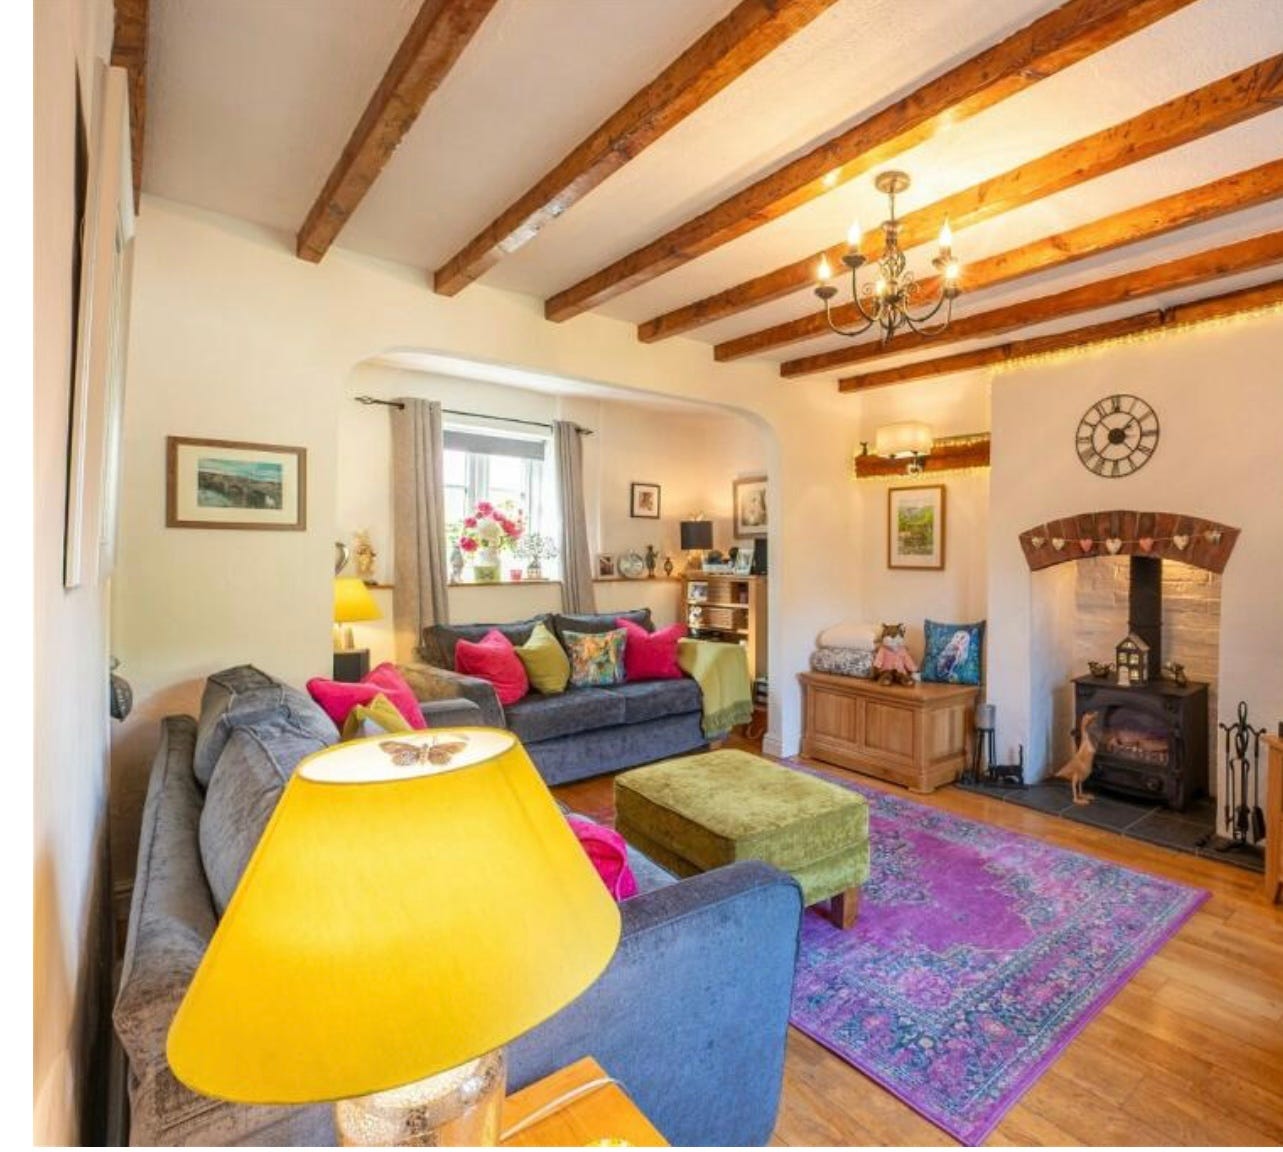
If you’re following me over on instagram you’ll no doubt have seen our living room progress. We finished harlow’s room end of Feb, and I immediately turned my attention to our family room; a great sized lounge, especially for a cottage and one of the areas that made me fall immediately in love with our current home. I wanted us to have a shared space where we felt ‘at home’ and surrounded by stuff that felt like us. I also ideally would like to complete all of of our downstairs’ spaces before moving upstairs.
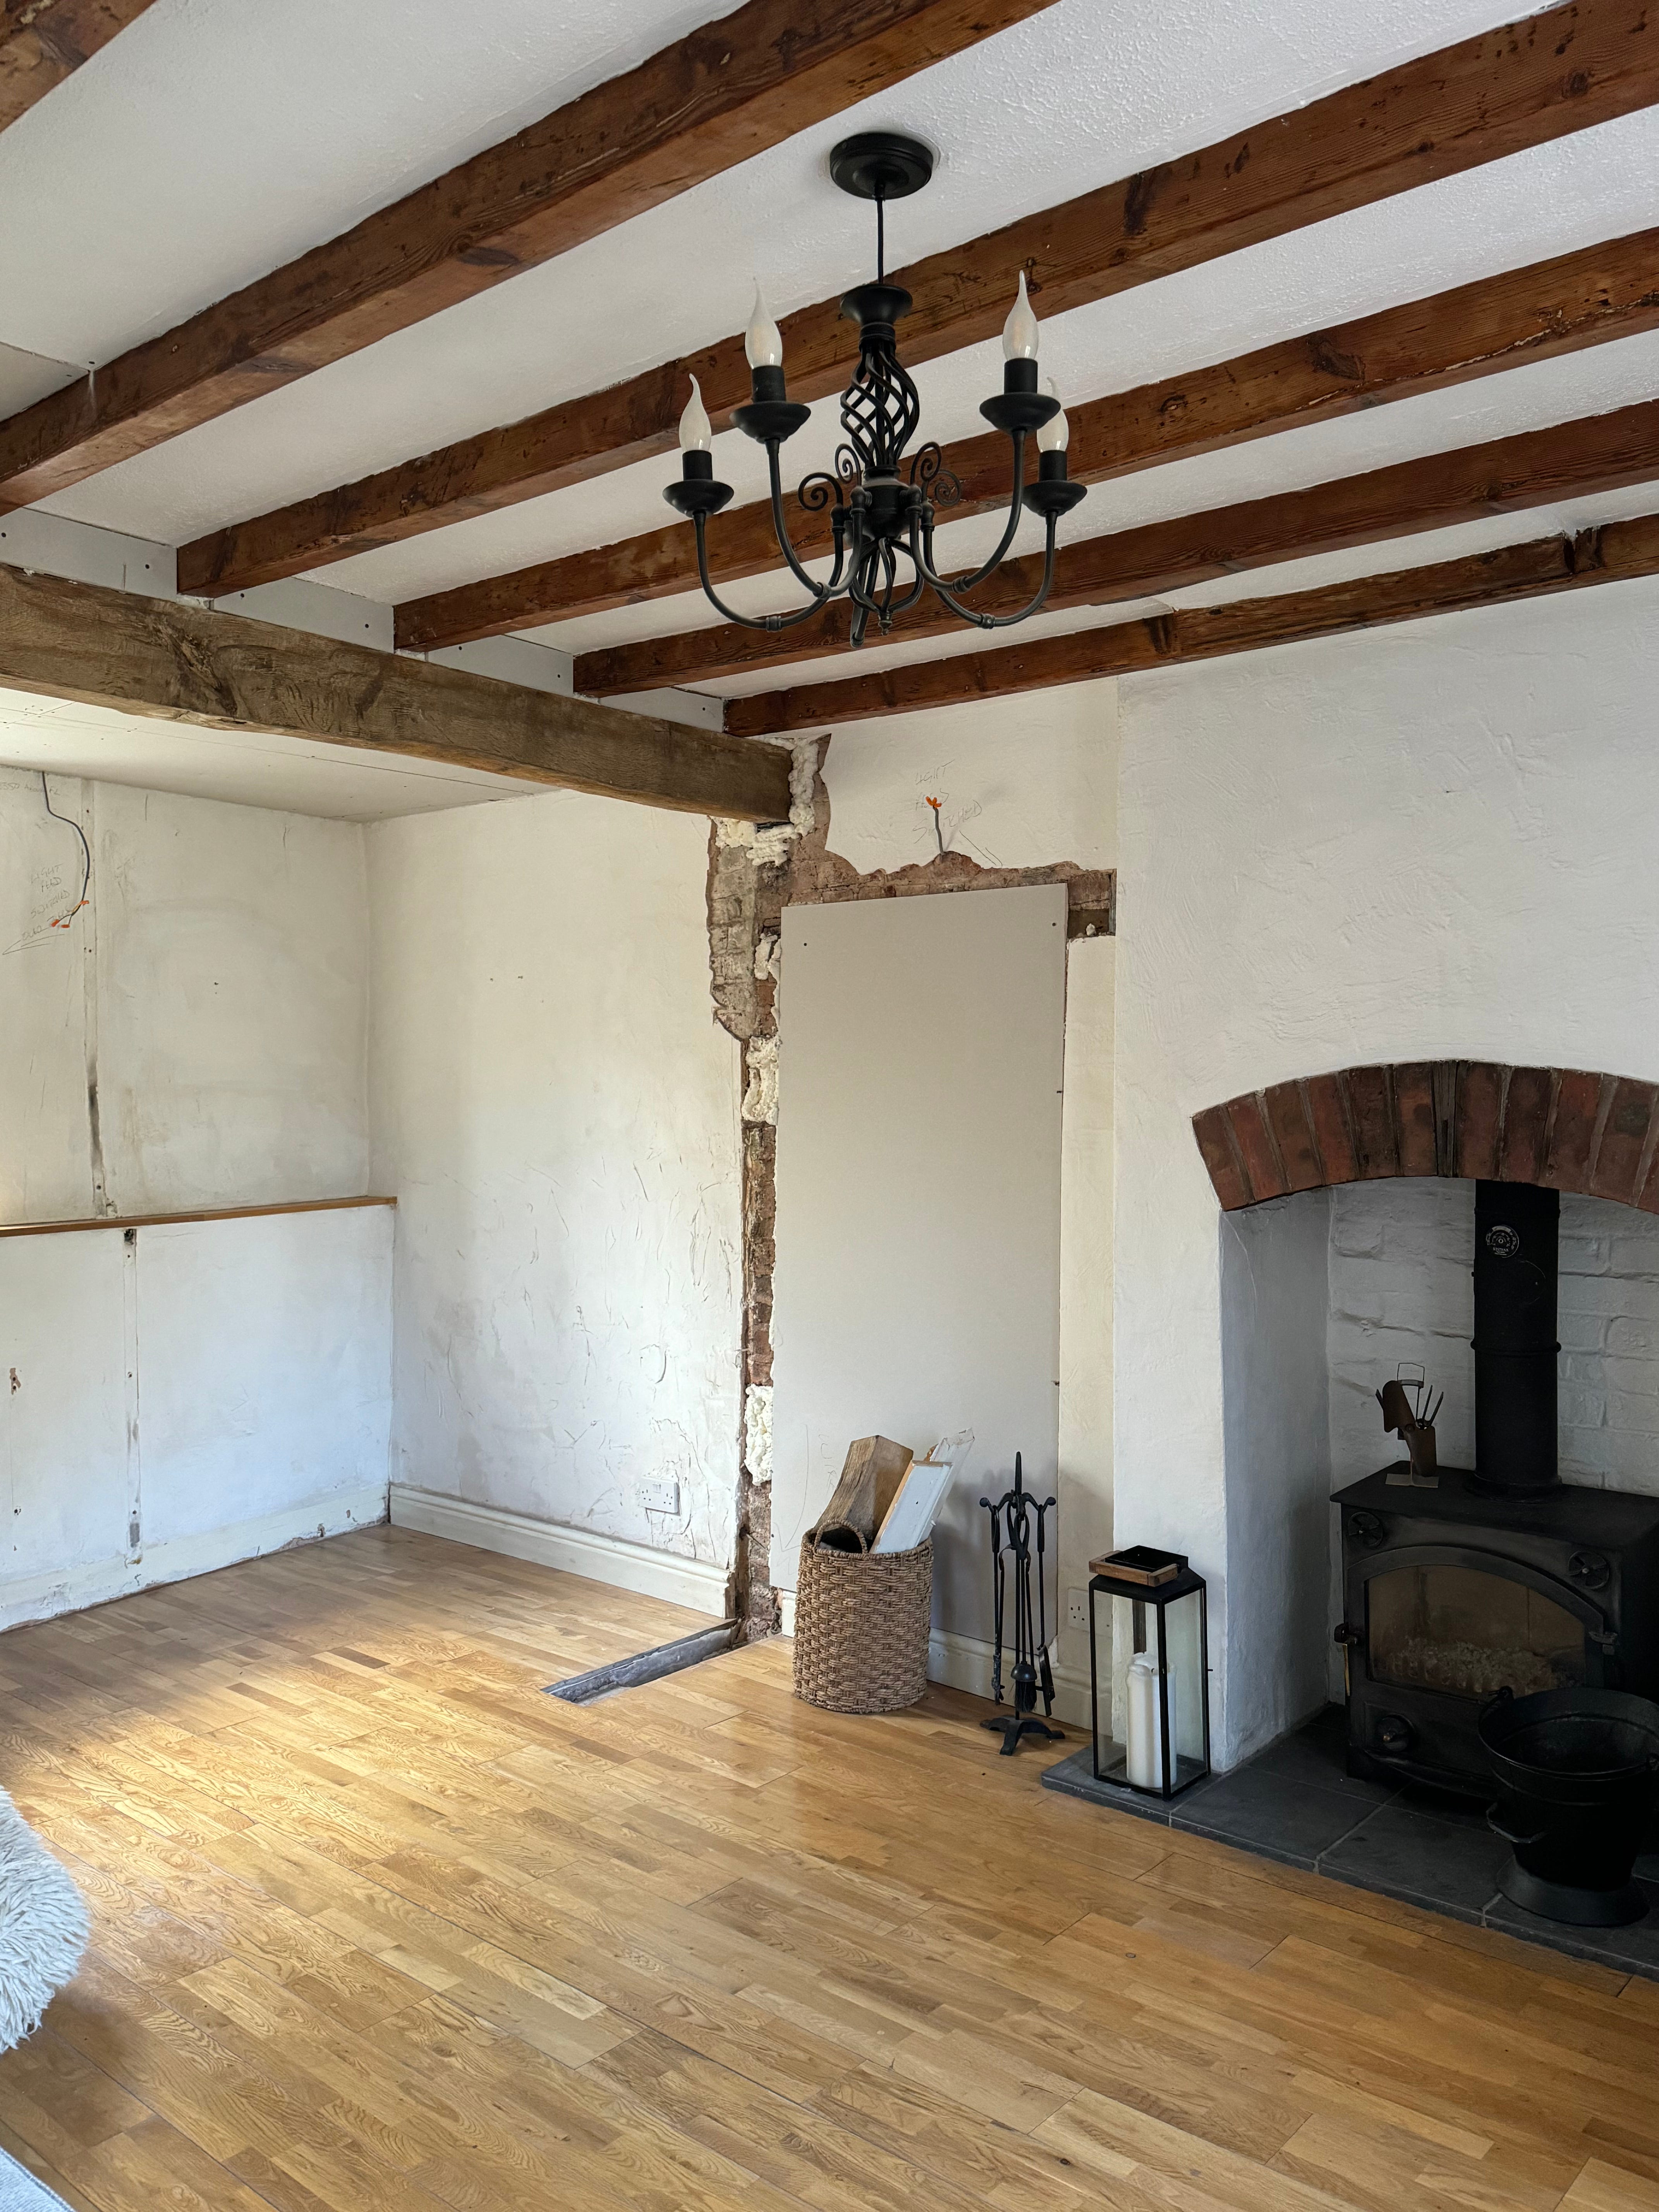
When we moved in, the living room was covered in artex (not a good look) and had an archway that kind of divided the room into two; this archway had originally been a wall that separated the living room from what would have been the kitchen but I knew it had to go. It really impacted the room’s flow and meant that future furniture placement would be limited.
Once the archway had been removed, our lovely builder inserted a reclaimed oak beam into the ceiling to support the ceiling above and stop it caving in (always helpful.) It looked better and less jarring immediately. We think the wall had been removed and made into the arch in the 80’s and it just felt at odds with the other, stouter arches within the property and other features within the room. It cost around £1000 in total but it was well worth it; and more importantly, key to get a big messy job out of the way like this prior to decorating (old me would be so proud.)
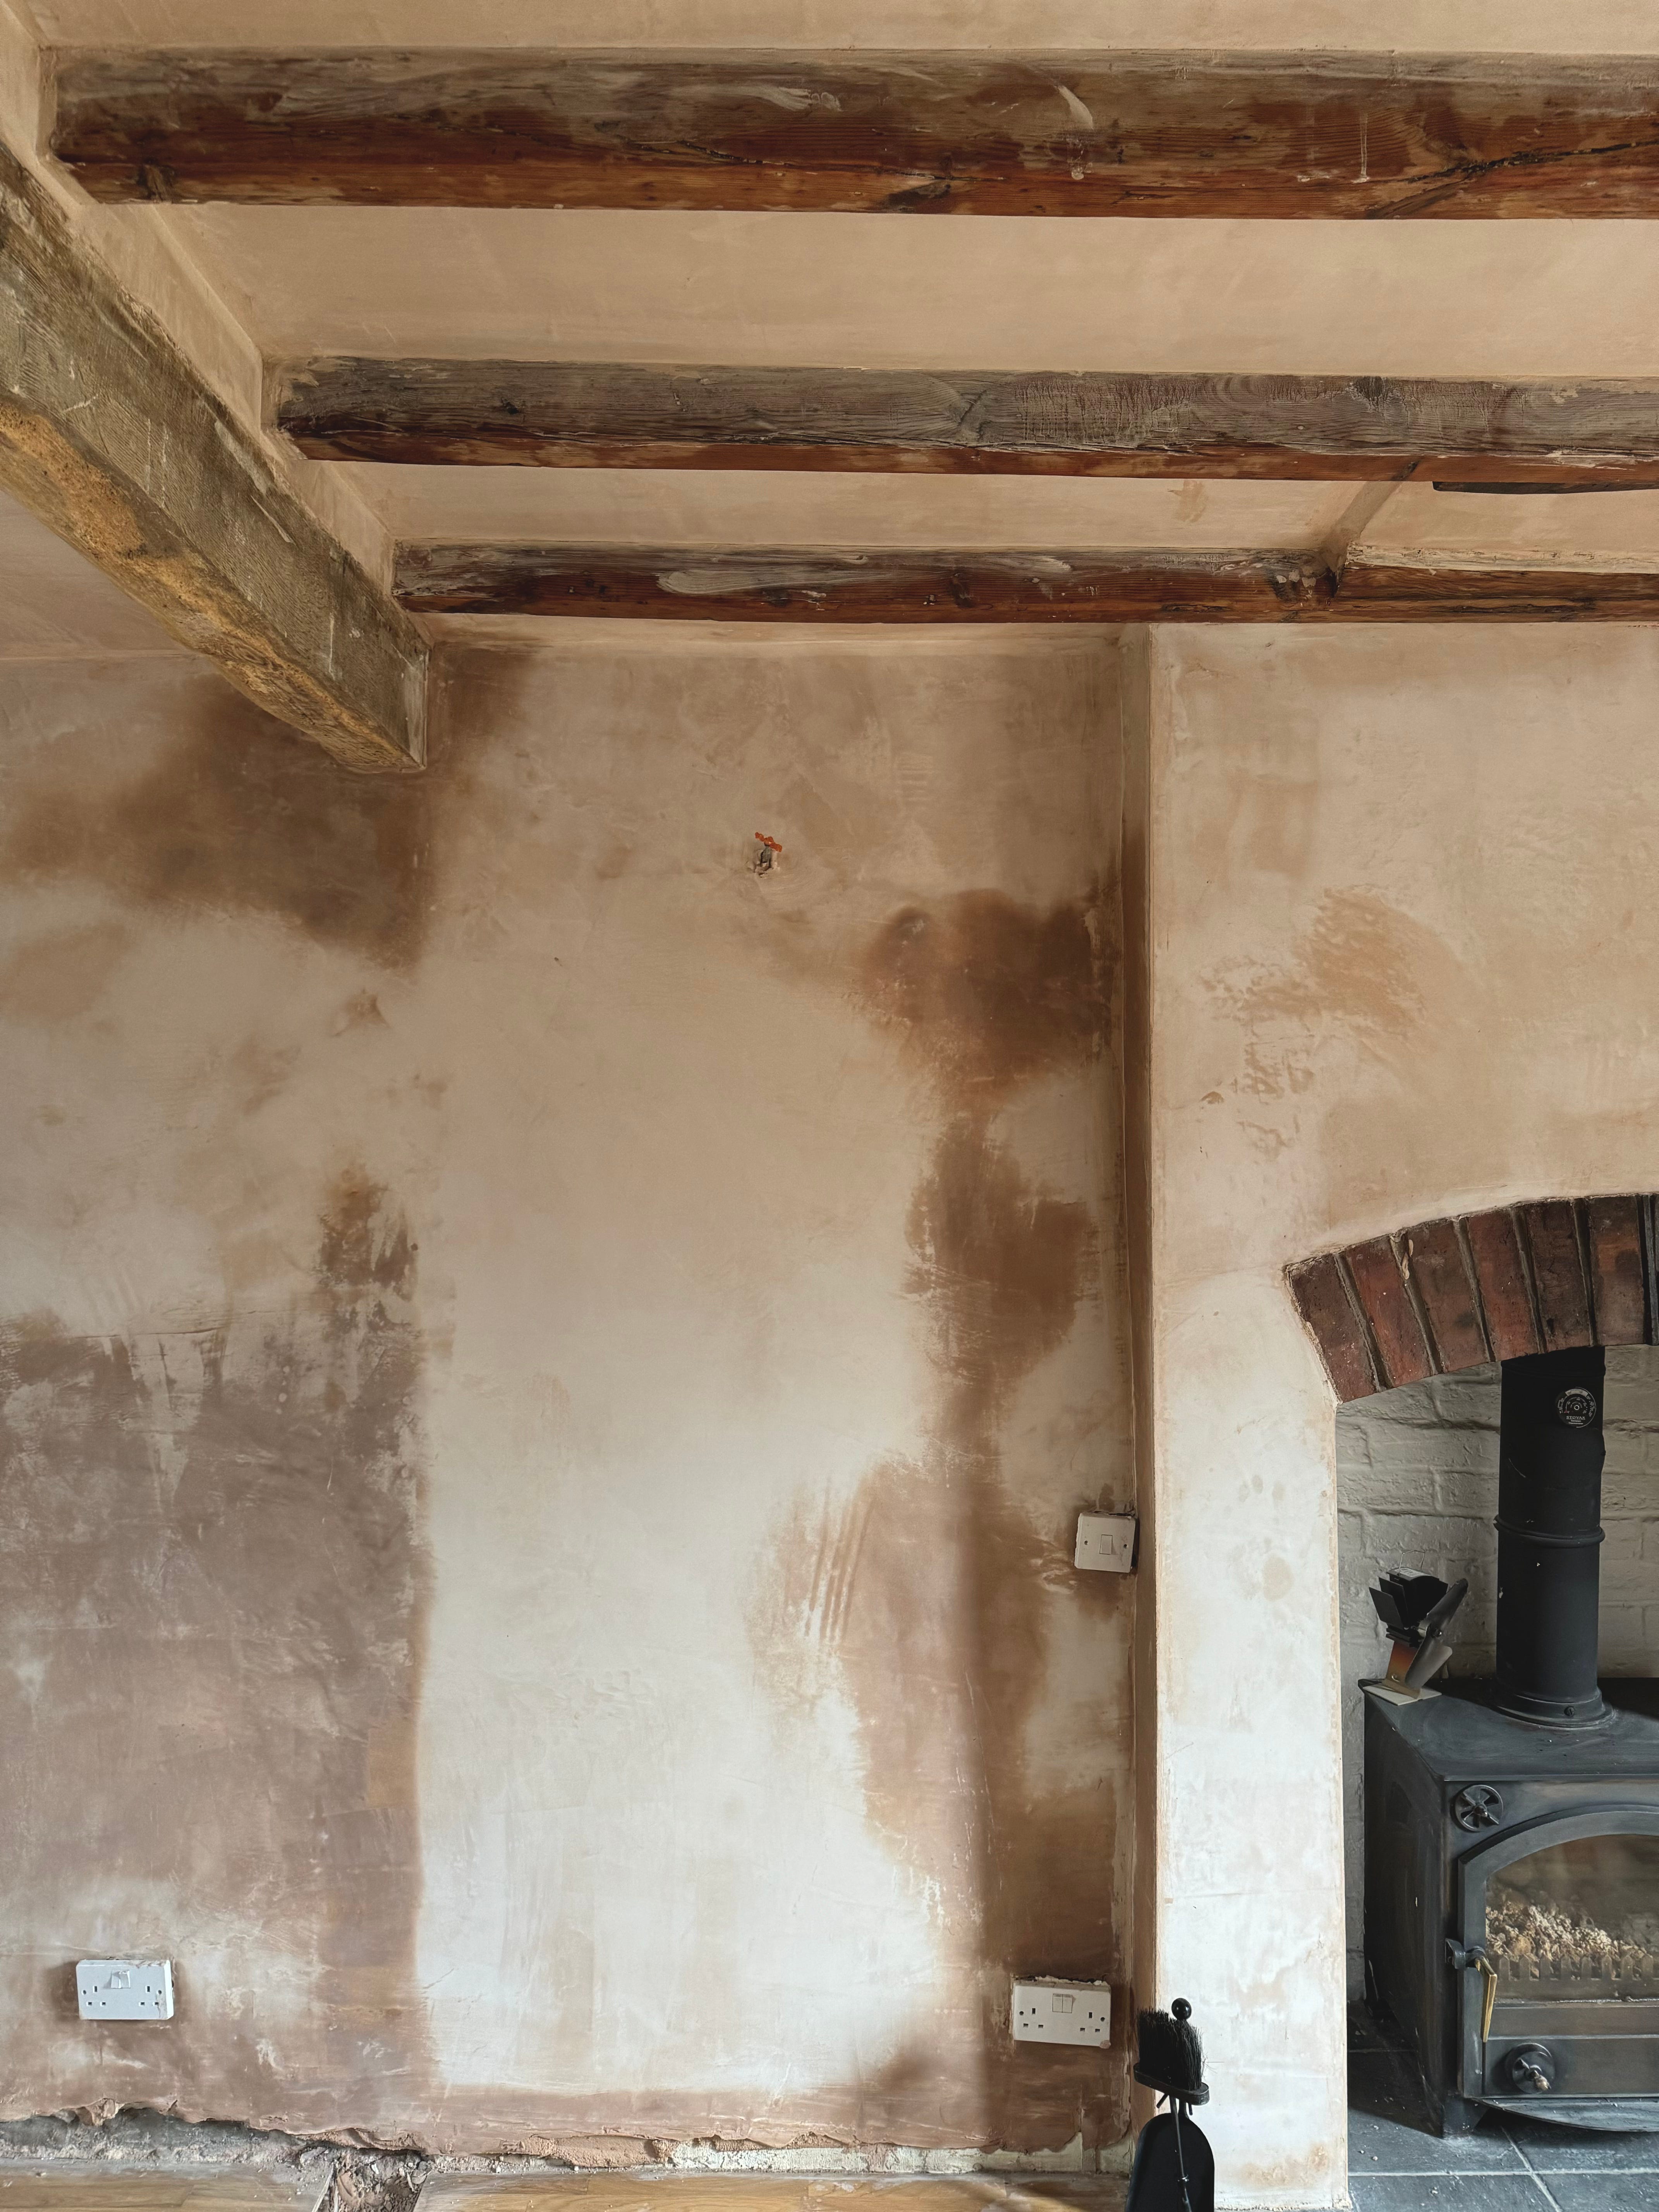
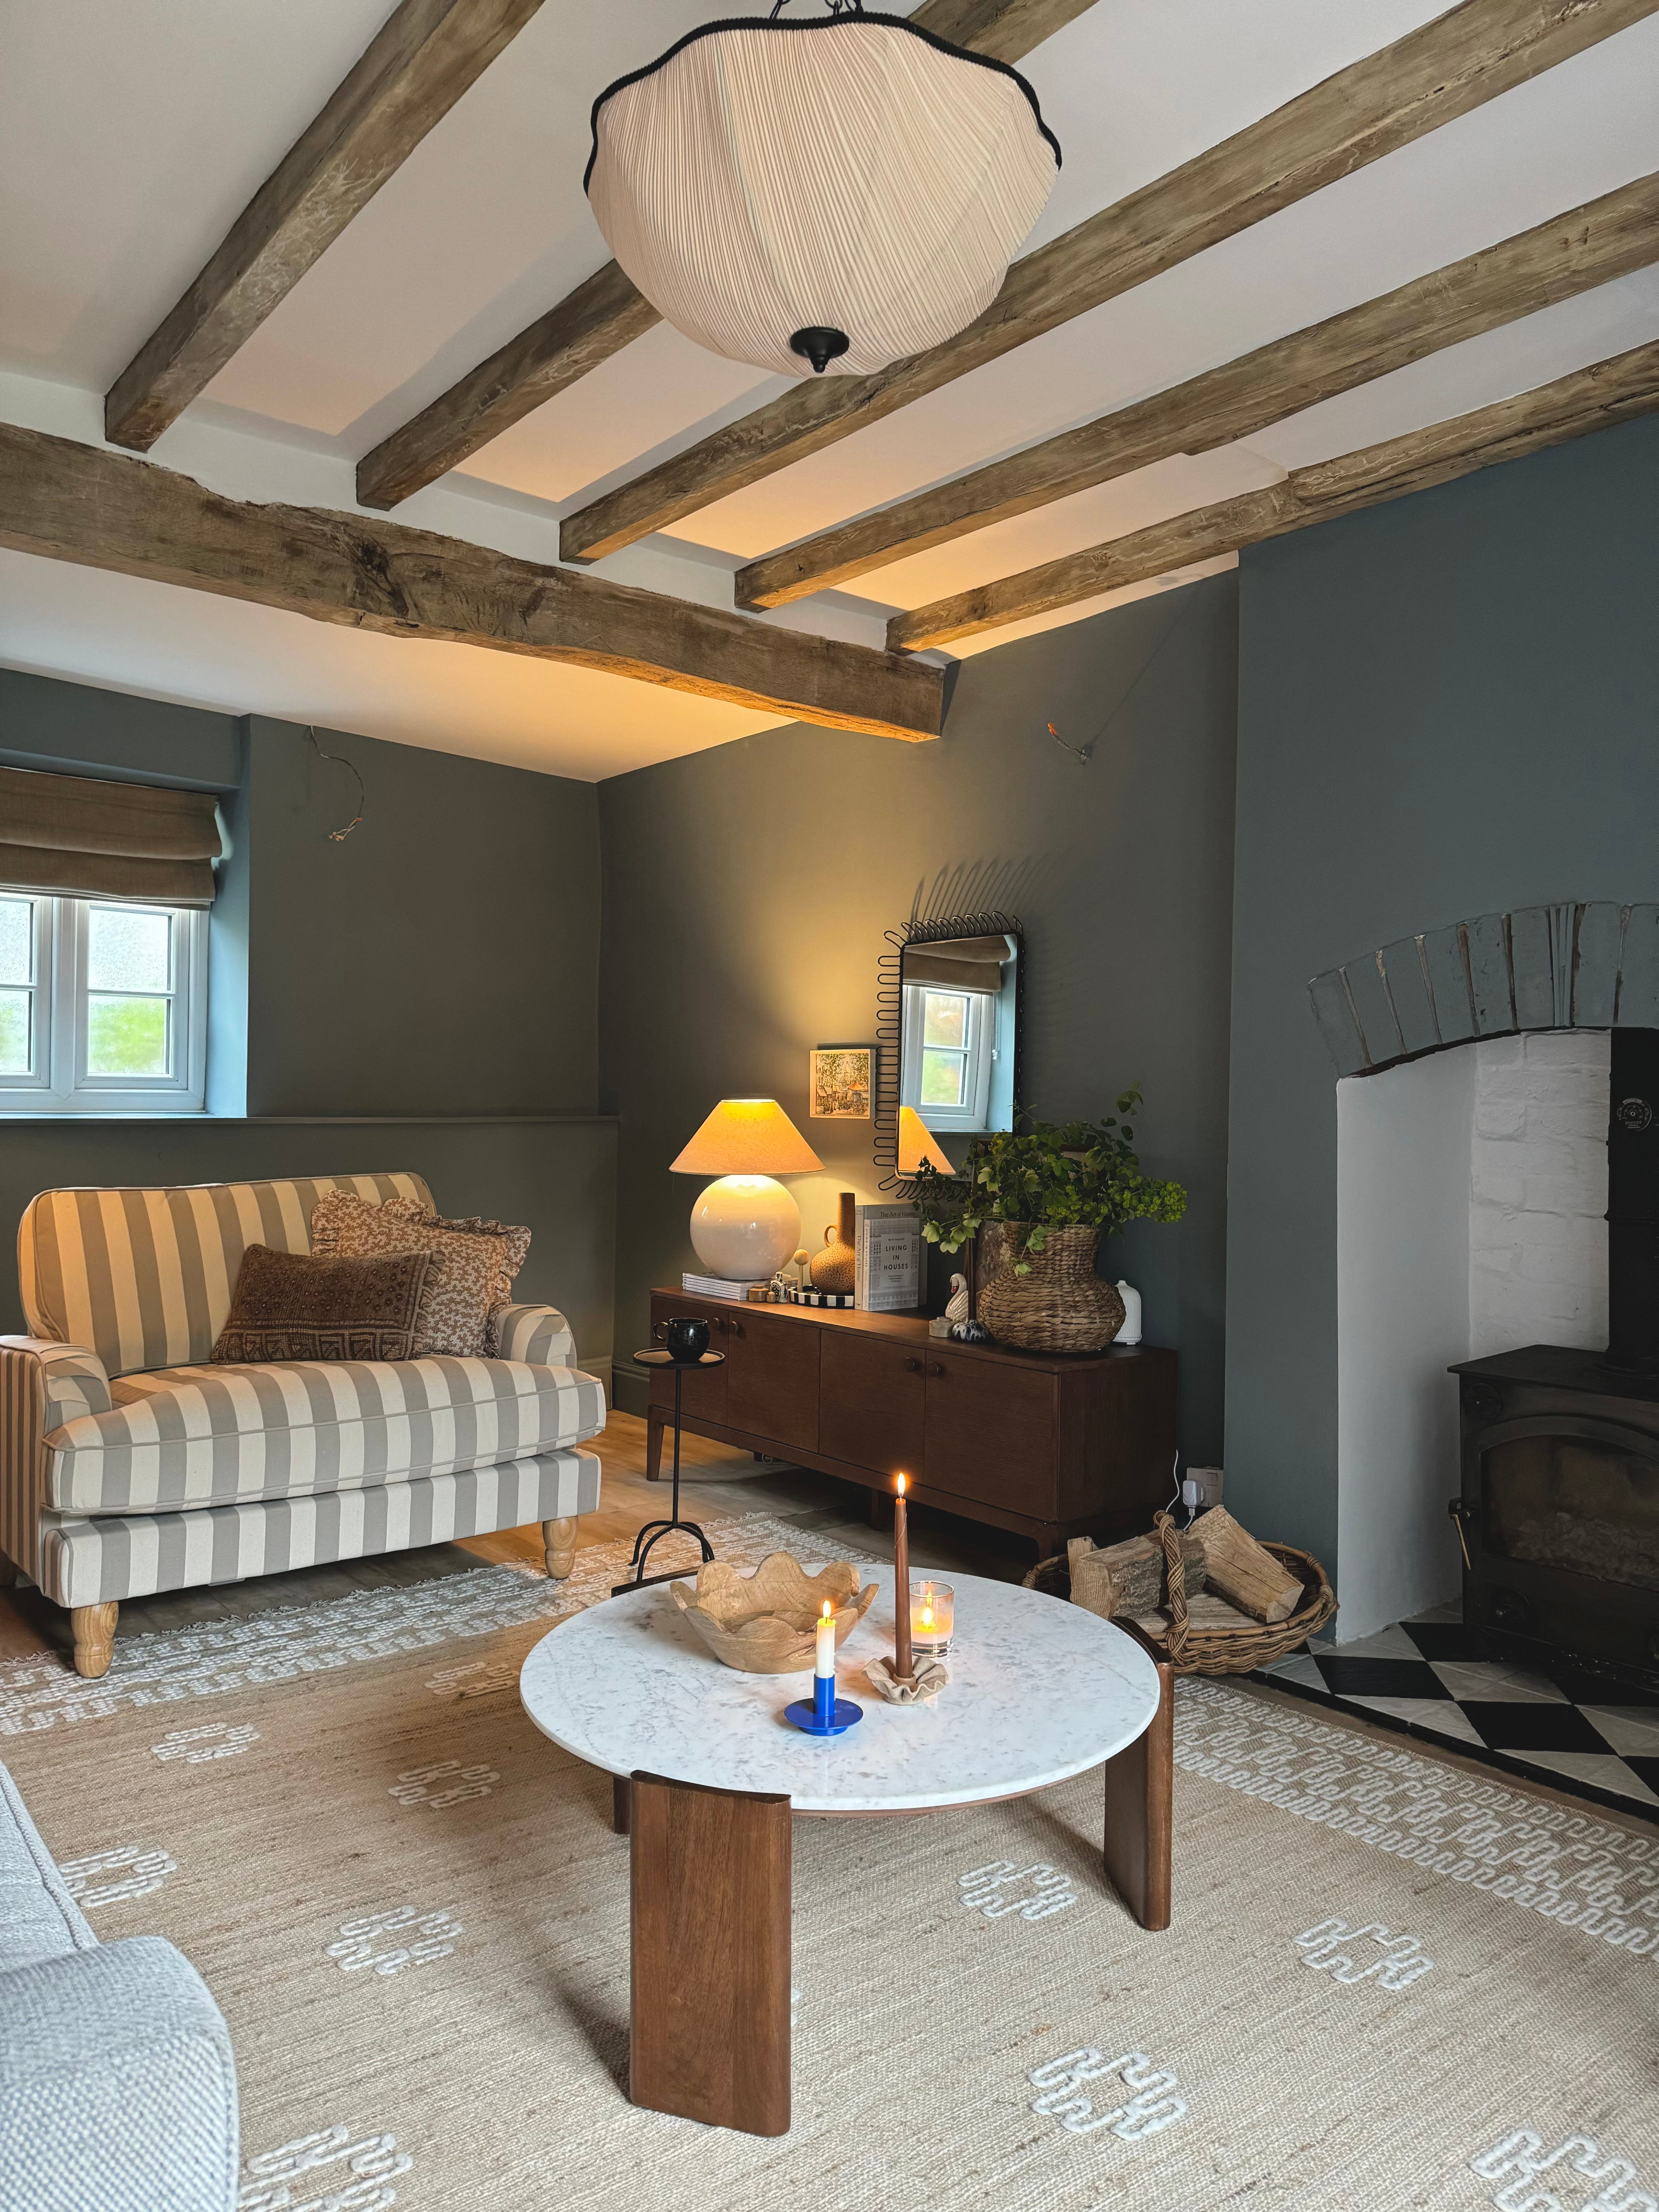
Once the beam was secure, we were able to get the plasterer in and tackle the artex ridden walls. Artex can contain asbestos but was actually banned in the UK in 1999. We think the artex was actually added in 2000, so likely to be asbestos free however we didn’t want to risk it and so rather than remove the the offending product, which can release chemical fibres into the air, our plasterer used a special solution on top, and then skimmed over it. I don’t hate a textured wall and lime washed the walls in our last house but artex is different in my opinion; it feels dated and very much of a time. I wanted to use a blue in this room and that required a smooth surface. I also wanted to get the crisp lines back around the fireplace.
Speaking of which, I also gave the hearth tile, which again, I didn’t love a new lease of life by painting over it with a checkerboard design. Honestly I think it looks great, plus, it only took me about an hour to complete. I didn’t even use a ruler as couldn’t find one when I started the project so I substituted with a copy of Living Etc.
We currently have our friend working on a surround for us (the perks of having tradies for mates) and I am so looking forward to getting that on. I really do prefer the look of a fireplace with a proper surround as opposed to a simple opening (although I love that vibe too.) As someone who loves to style, the lack of one means missing out on opportunities to layer the mantel piece (especially come Christmas time.) The fireplace is also quite big, and I feel like it needs something to set it off.
The next step was to sort the very orange floor. Not in a position to replace, or indeed want to replace as it’s actually real wood, we decided to try our best to de-orange it instead. We hired a few tools from Brandon Tool Hire including an upright floor sander and an edging tool. I let my husband do this job because I had visions of going though the wood into the concrete.
After a full day of sanding, we were left with a much softer floor and the orange hue removed. I then used a dark antique pine stain and applied liberally as it was the closet in colour to the ceiling beams (more about those next.) It’s not perfect but I can live with it. Plus I have a huge rug covering most of it anyway!
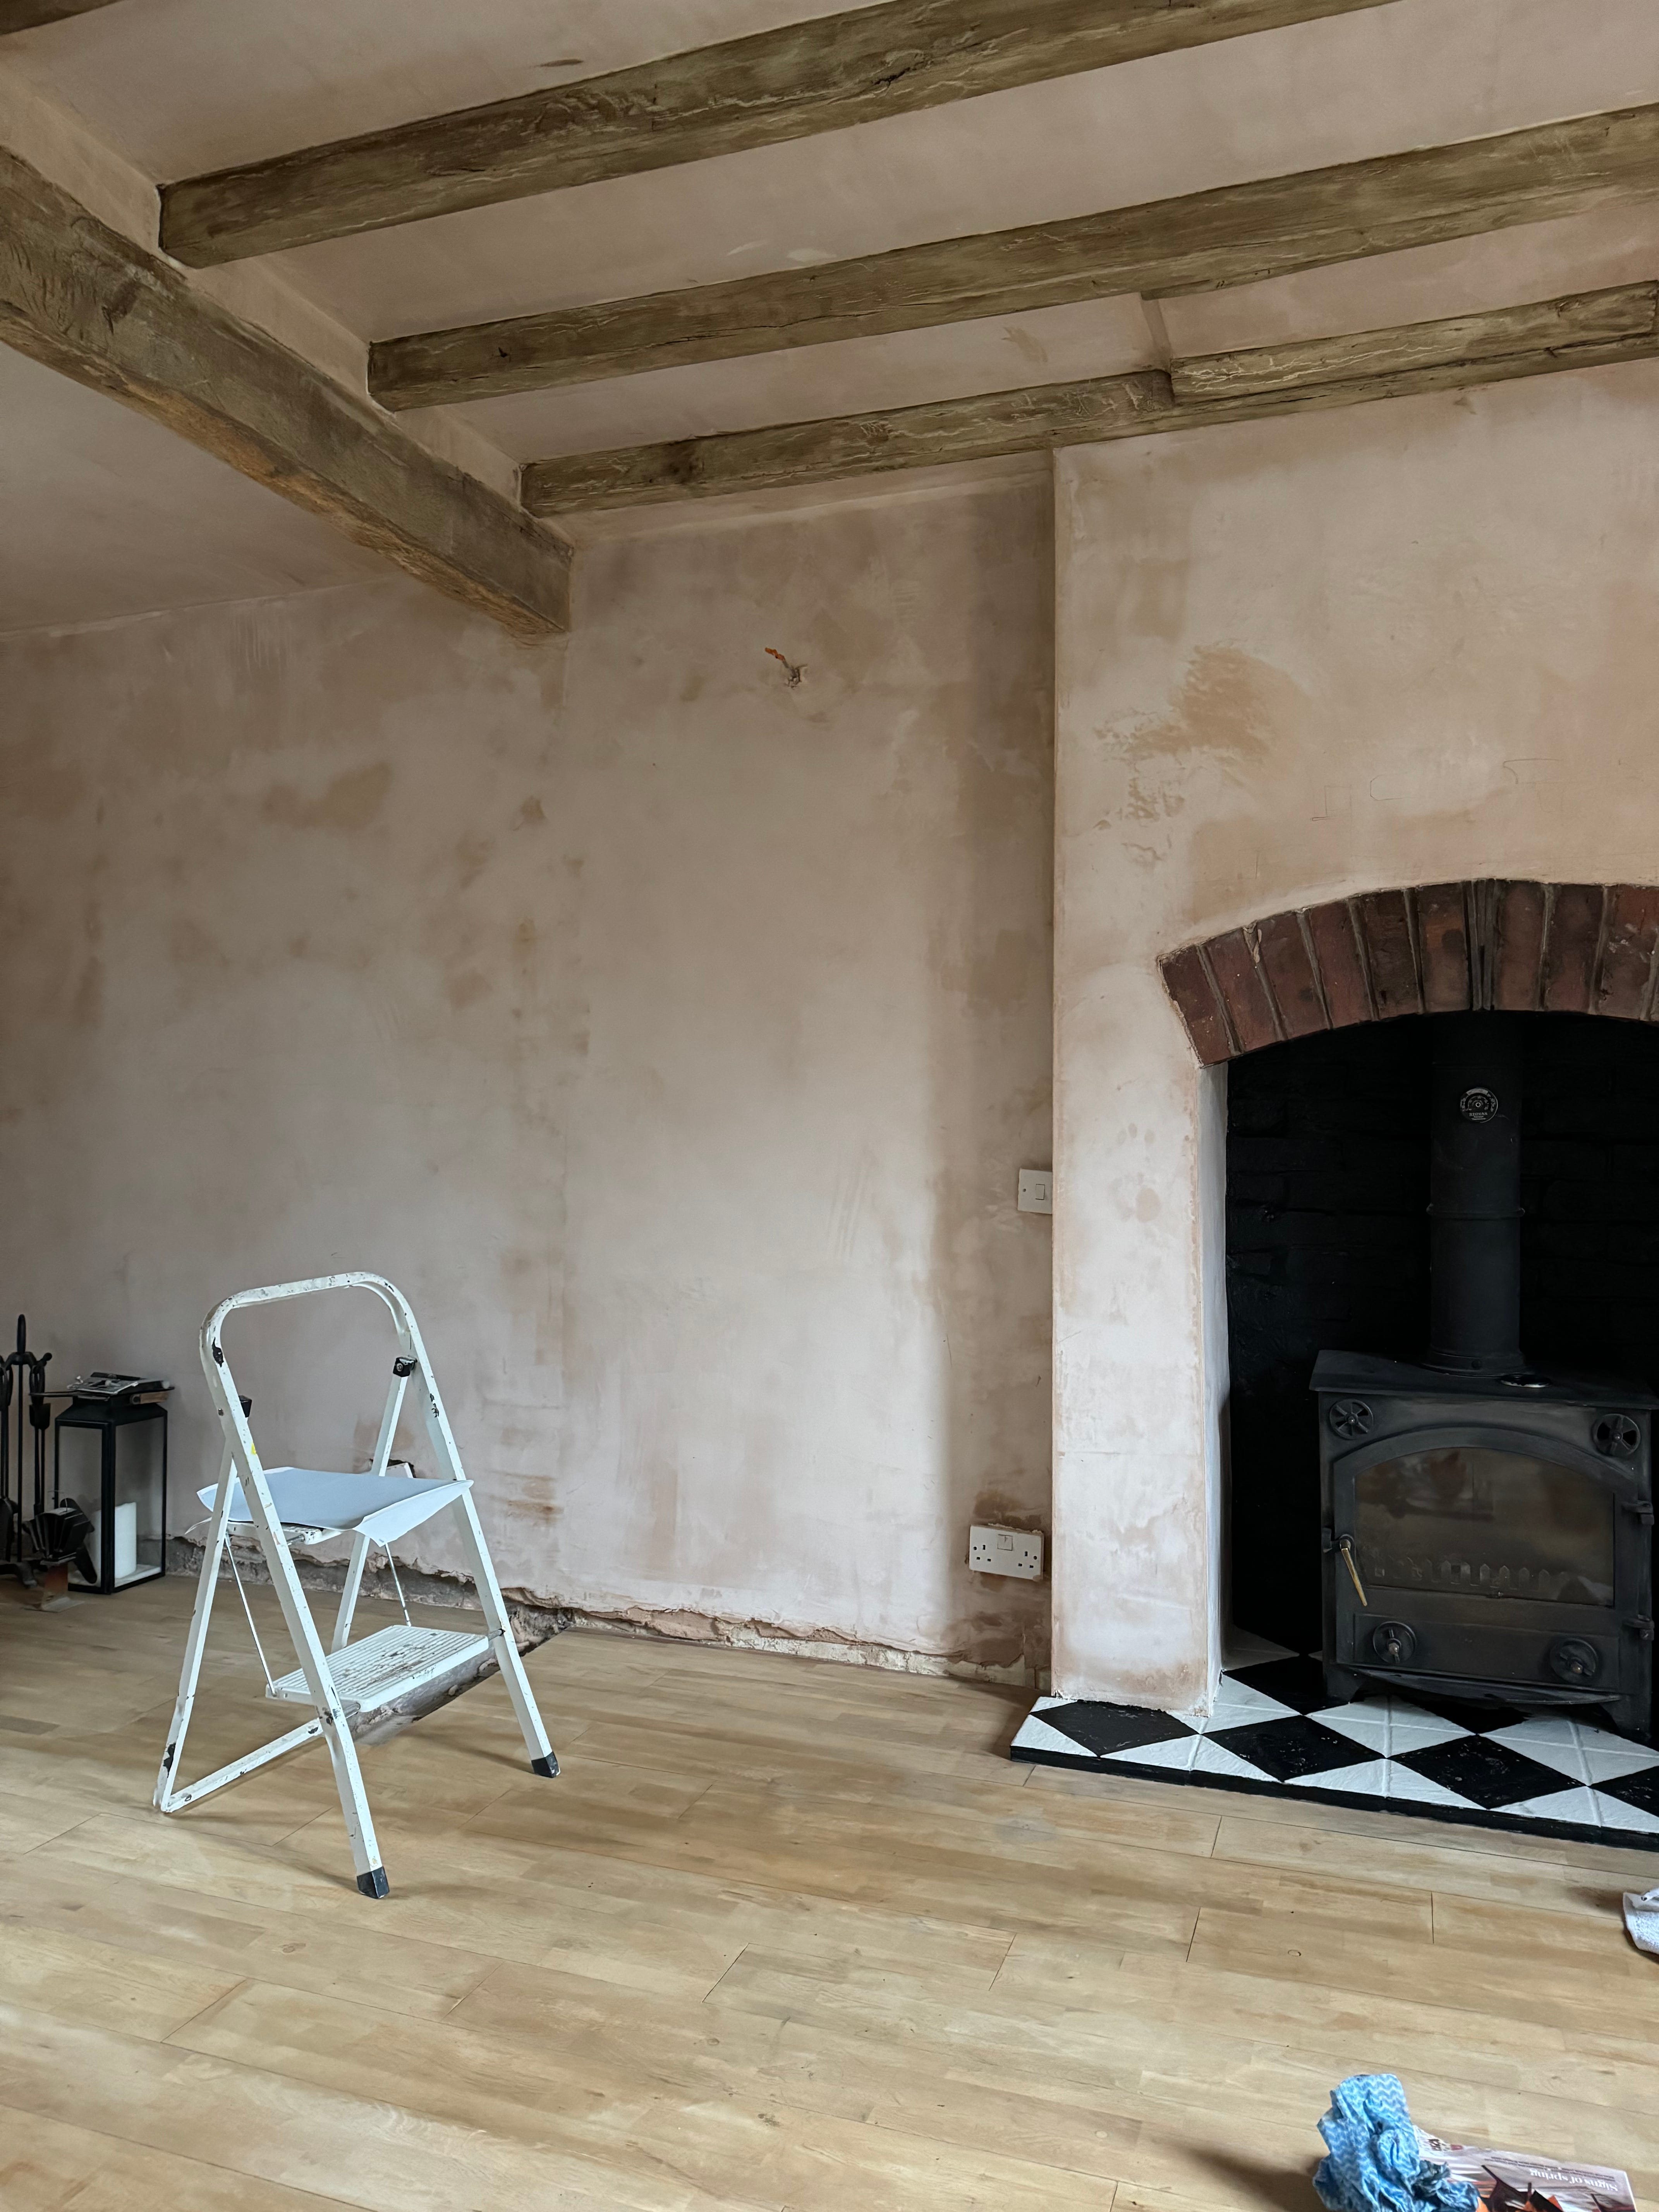
We are so lucky to have original beams in most of the rooms in our new home; including the living room. They are one of my most beloved things in the cottage because they create so much interest and such a cosy feeling. The living room beams had been stained with a very orangey varnish (like the floor!) and once the big beam had been put in they really clashed. The thought of stripping them made me feel queasy, and I knew sanding would take up too much of my limited time, so, after reading up about the Frenchic Beam Hack, I decided to give it a go. You can read in detail about the hack on Frenchic’s website but essentially you paint out your wood (or any material) with a primer, and then once dry, apply a brown wax which replicates the grain of real wood. I was really skeptical and honestly thought it wouldn’t work and so was blown away with the result. You can see the reveal in this reel. but sufficed to say that they look amazing; a gorgeous soft oak that ties in perfectly with the big beam.
Now it was time to paint. I was honestly so, so excited for this stage and yet when it came to executing it, I actually had a major wobble. Picking a paint colour is hard, there are so many for a start and nothing is quite as disappointing as when you have a vision in your mind that doesn’t quite then translate into real life. I had originally wanted to go for a delicate, very pale blue after seeing images of eclectic lived-in rooms on socials. I was positive it would work in the cottage and yet when it came to testing, it just wasn’t gelling. I sampled a tonne of colours, lots of lights, some darks and some hovering somewhere in the middle but ultimately, the clear winner was Farrow & ball De Nimes; which ironically was my initial choice when I’d mood boarded the space! De Nimes is a moody, dusty blue which looks exquisite in sunlight and on drizzly days is a little more of a faded, greyish-blue hue. It is really a wonderful, and interesting colour and feels like it was made for the space. I still got my blue and to honour this year’s big colour, I just had to work out which tone would make the room sing rather than being trend-led.

When the room was plastered the existing skirting board was also removed. It was a very short board and not one that we loved. Even though it worked proportionally in the space, I knew I wanted a deeper skirt in here and went for a much higher profile in the end. I know many people get super precise about time periods and these types of mouldings/ features but for me, I don’t think it matters that much. I think the deeper skirt works really well and helps the rooms to feel chunky and solid; also, despite living in a cottage, the ceiling height is actually pretty generous and can carry off a taller board.
Once I’d painted it was time to consider furniture. We moved into the cottage with very little furniture due to selling most of it to the person who bought our old house, or donating it to charity etc. It was exciting to start again! Initially I had this image of really quaint, traditional furniture and purchased a console and coffee table along these lines, however once they were in they just felt a little too safe for me. A little ‘twee’ almost. So, I returned them and I went back to the drawing board and re-visited my stack of Pinterest images.
Although I still wanted to incorporate some traditional pieces; I felt strongly drawn to mid-century shapes. I love simple, clean lines despite the fact that I am essentially a maximalist decorator, and although I am always drawn to detail and drama, I actually love a really minimal piece of furniture. I love the unassuming way they are and how they clash with the rustic-ness of the ceiling detail. I still plan to add a little chintz, but I feel that combining lots of styles will give our home character and longevity.
So with this in mind, I went for a TV console (used a sideboard) from my beloved Habitat and coffee table from Cult Furniture; the console mirrors the wood in the legs of the coffee table, and a few of our picture frames whilst the marble top adds additional texture. They just work so well and keep room feeling fresh and modern but still vintage. I realised that the lighter ceiling beams and floor needed contrast to stop the rom feeling flat and too matchy-matchy. I wanted it to feel eclectic but harmonious and the different variation in wood tones (which are then repeated throughout) really help to achieve that feeling.
I bought a bargain arm chair in a very dark, olive-y green from TK Maxx; a super modern style which is unusual and also really comfortable. It also swivels which works well for TV watching and reading. We are are awaiting our sofa. We also purchased a second sofa; a love seat from Dunelm in a mushroom stripe which feels fun, but also has traditional undertones. I love the mix of seating, and I think its prevents things from being too formal. It looks a bit thrown together which I love.
So now the main pieces of the jigsaw have been competed (bar our new sofa and fire surround plus we need to fit our switches and sockets) we can tick another room off the list.
It’s taken almost 4 months so far which I think is pretty realistic. To be honest had we not had money saved and ready to pay for building works etc then it would’ve taken longer as we would’ve definitely encountered budget constraints!
I’ll be sharing this room in full once the final bits are done so make sure to follow me over on the ‘gram if you’re not already!
Nina x