


This weeks in thoughts: from boxy to beaut. The evolution of the primary bedroom...

(The following post contains reference to paid partnerships on other platforms.)
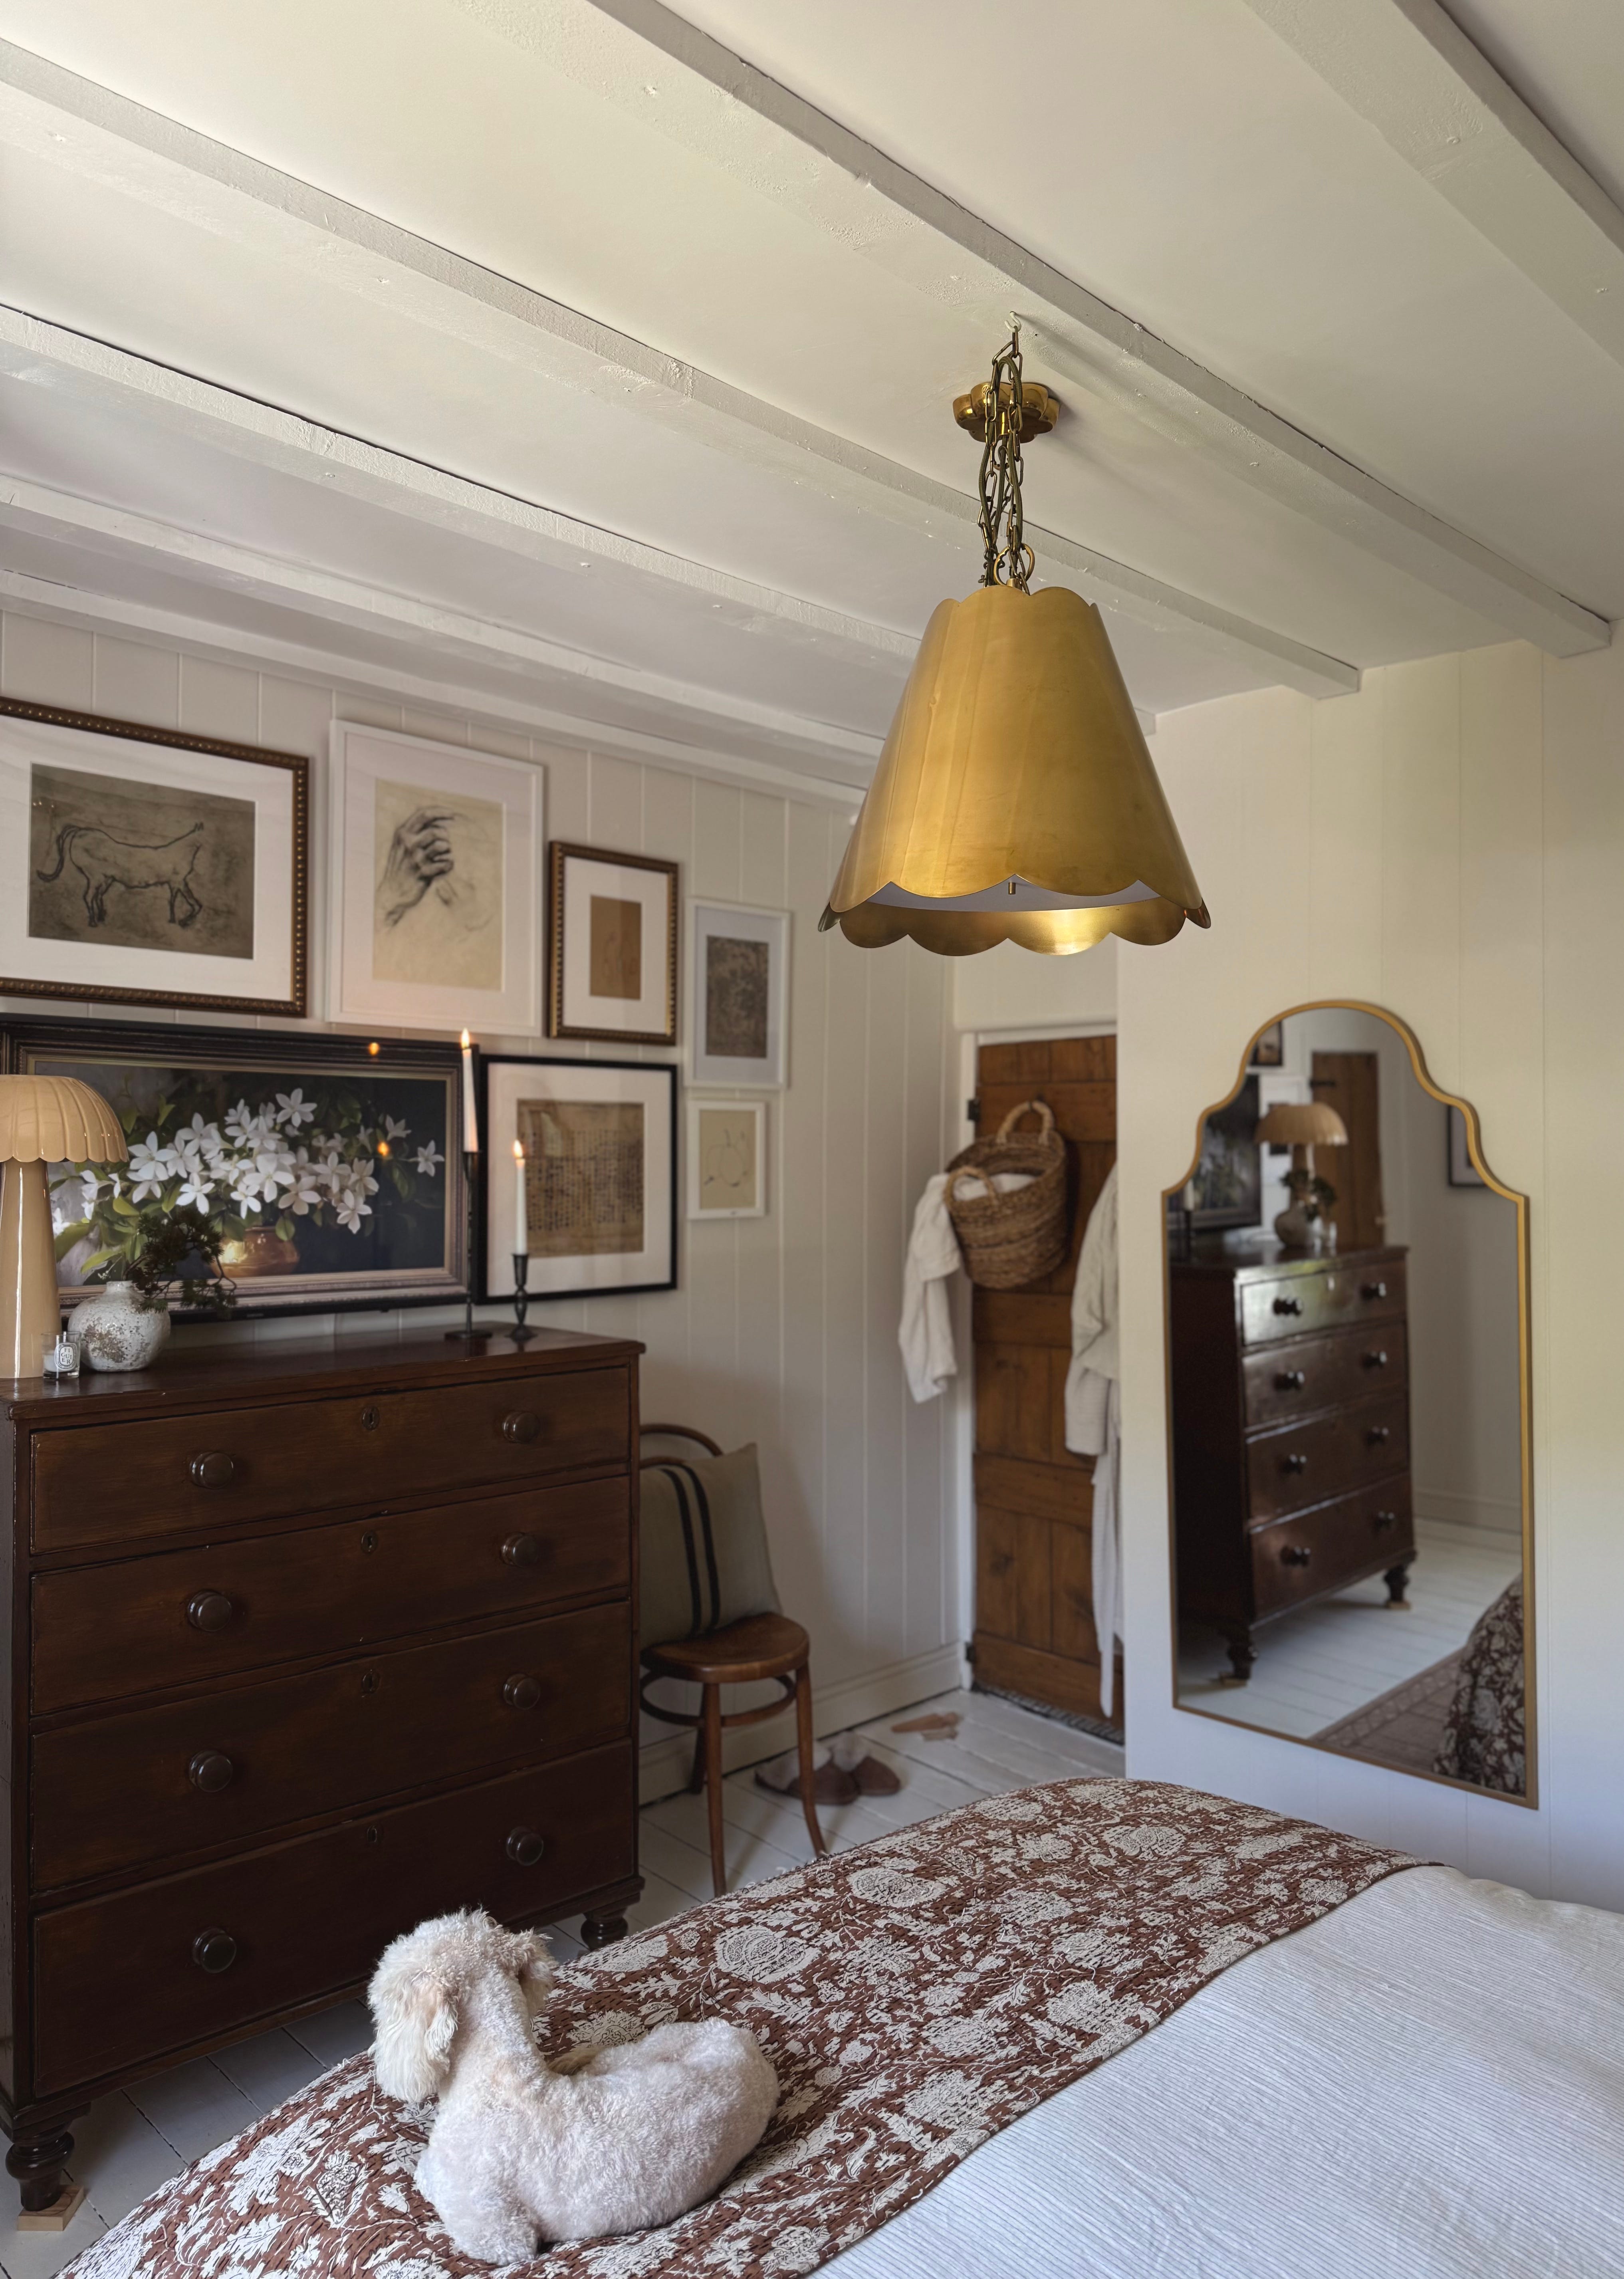
It’s FINALLY complete and I am OVER the MOON with the results. Seriously delighted. I feel like whenever you finish a space, it naturally becomes your most favourite but in the case of our primary bedroom I genuinely feel like it’s the best work we’ve ever done.
I discussed my plans for the space here and I think it’s worth revisiting this post to see how much my original vision, and the result, aligns. Personally I think I’ve pretty much stuck to my plans and have taken inspo from my curation of images whilst ensuring the room reflects ‘us’.
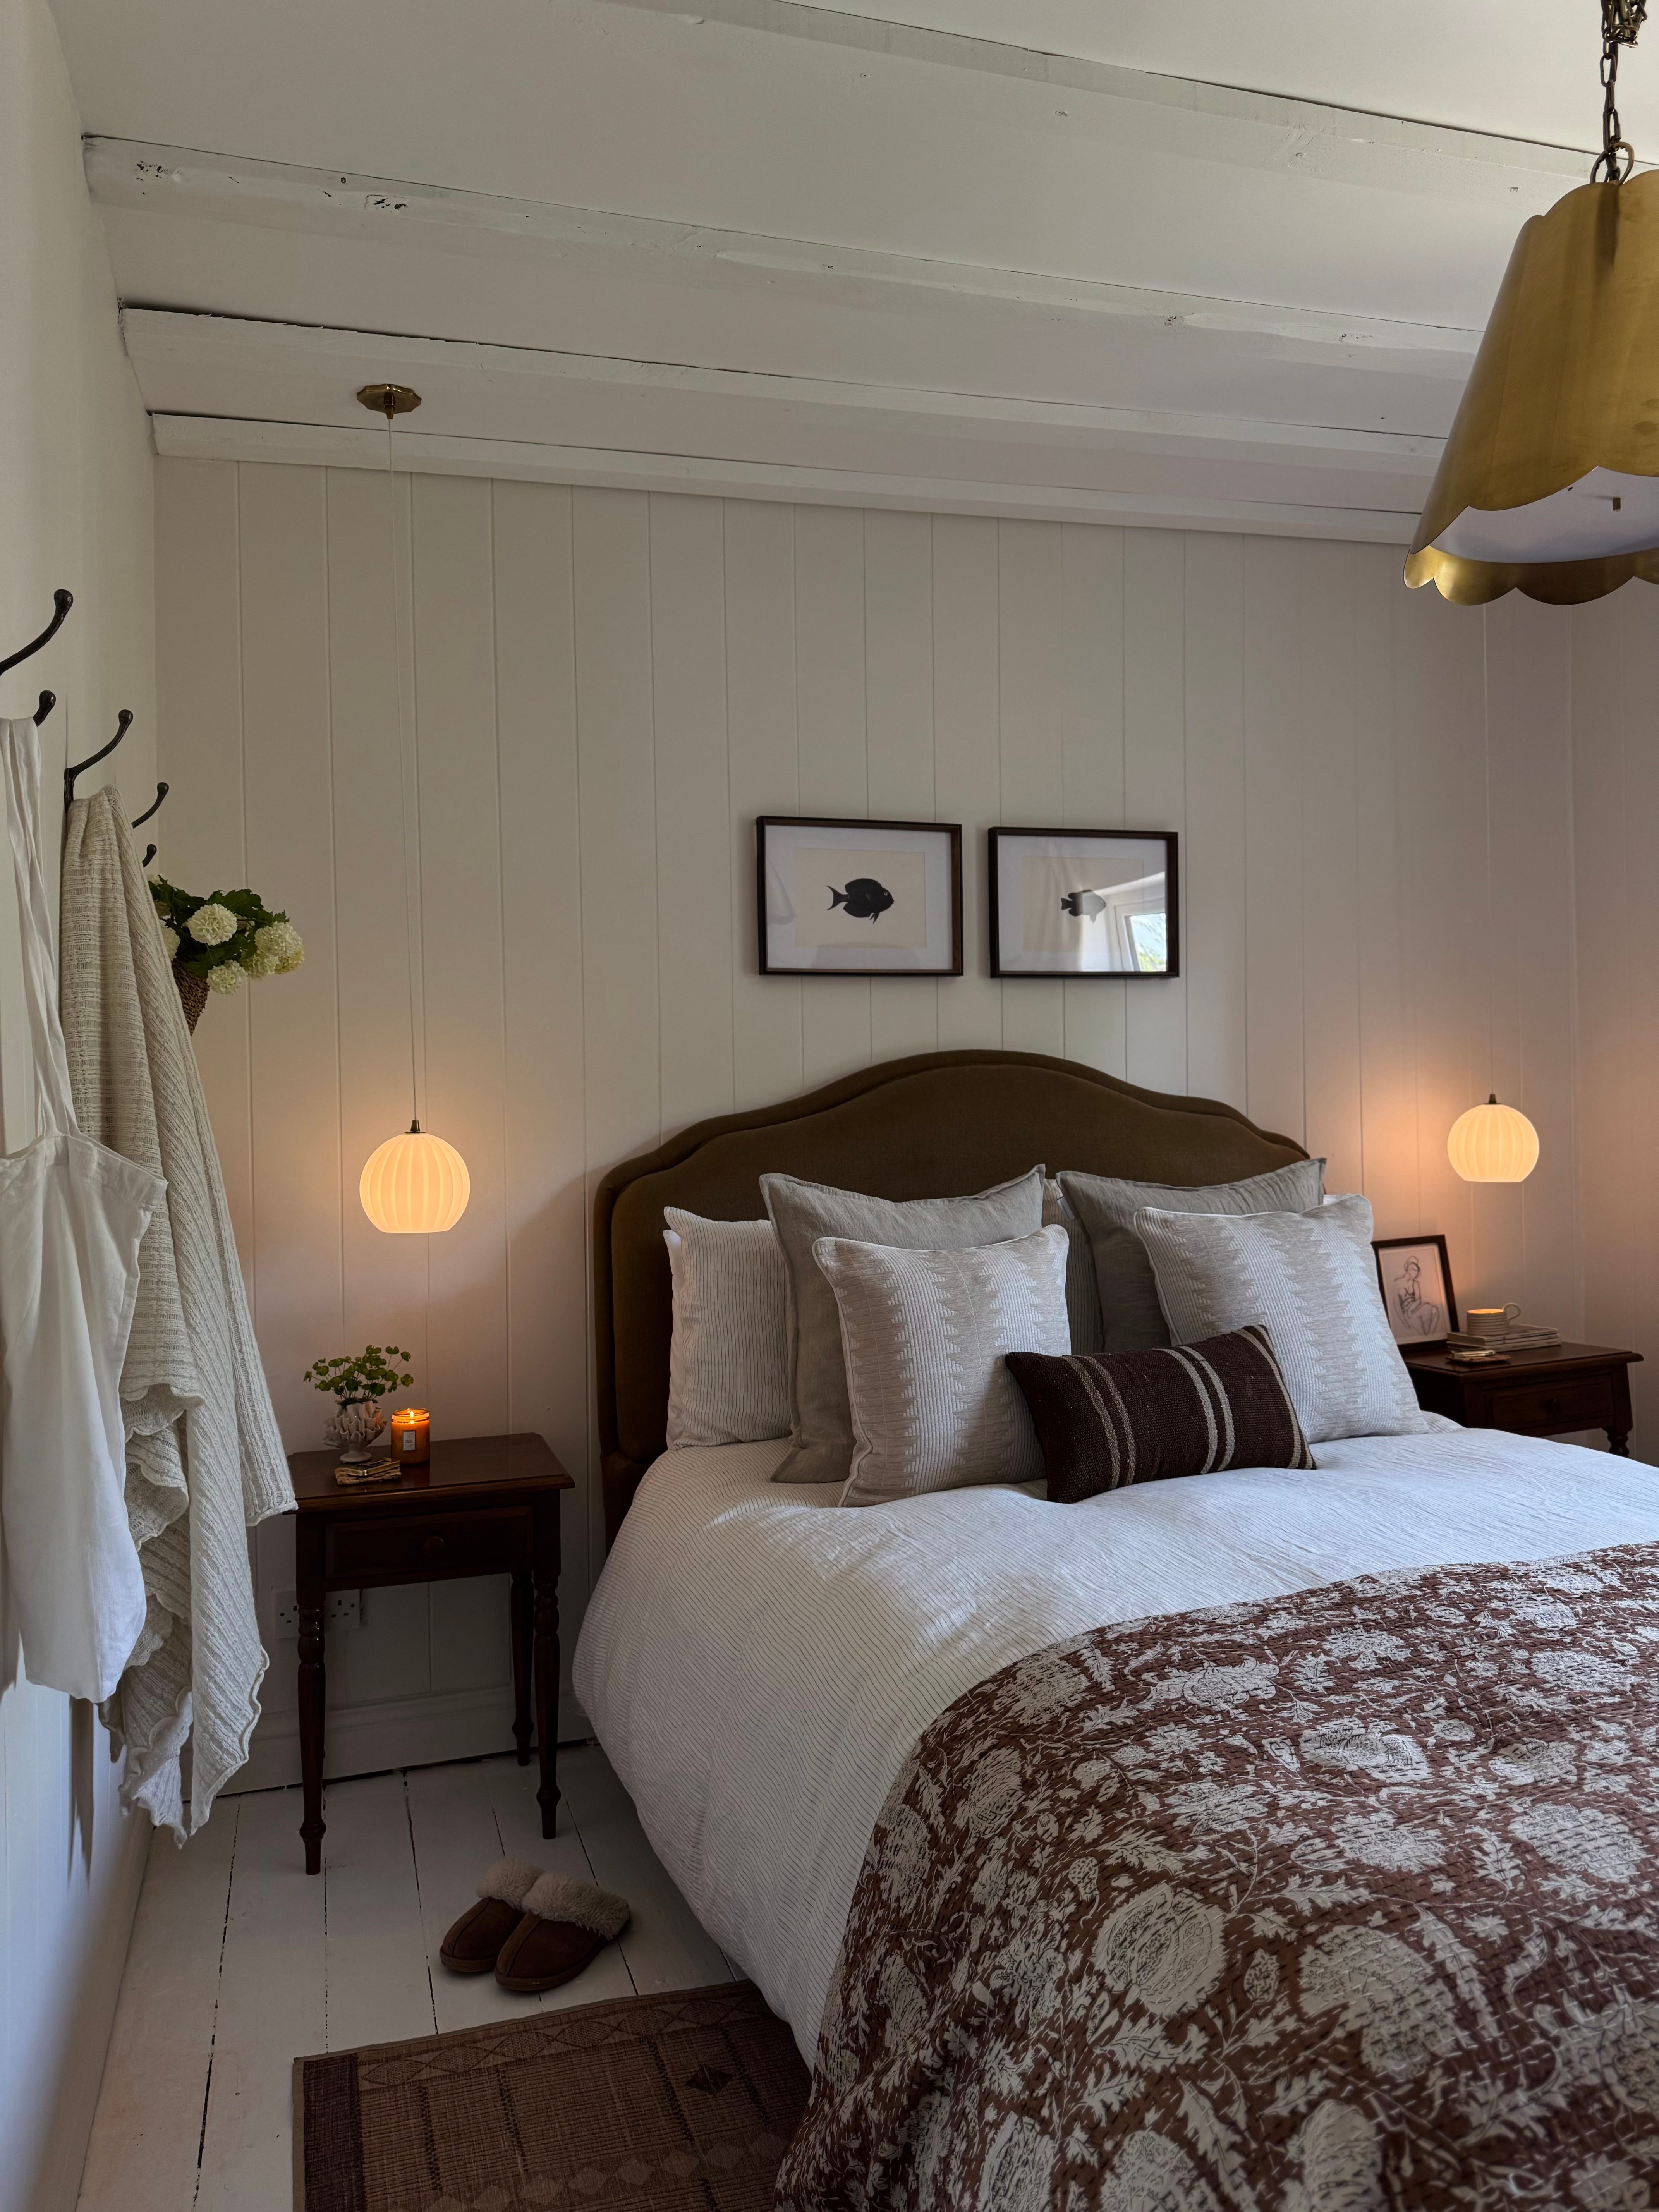
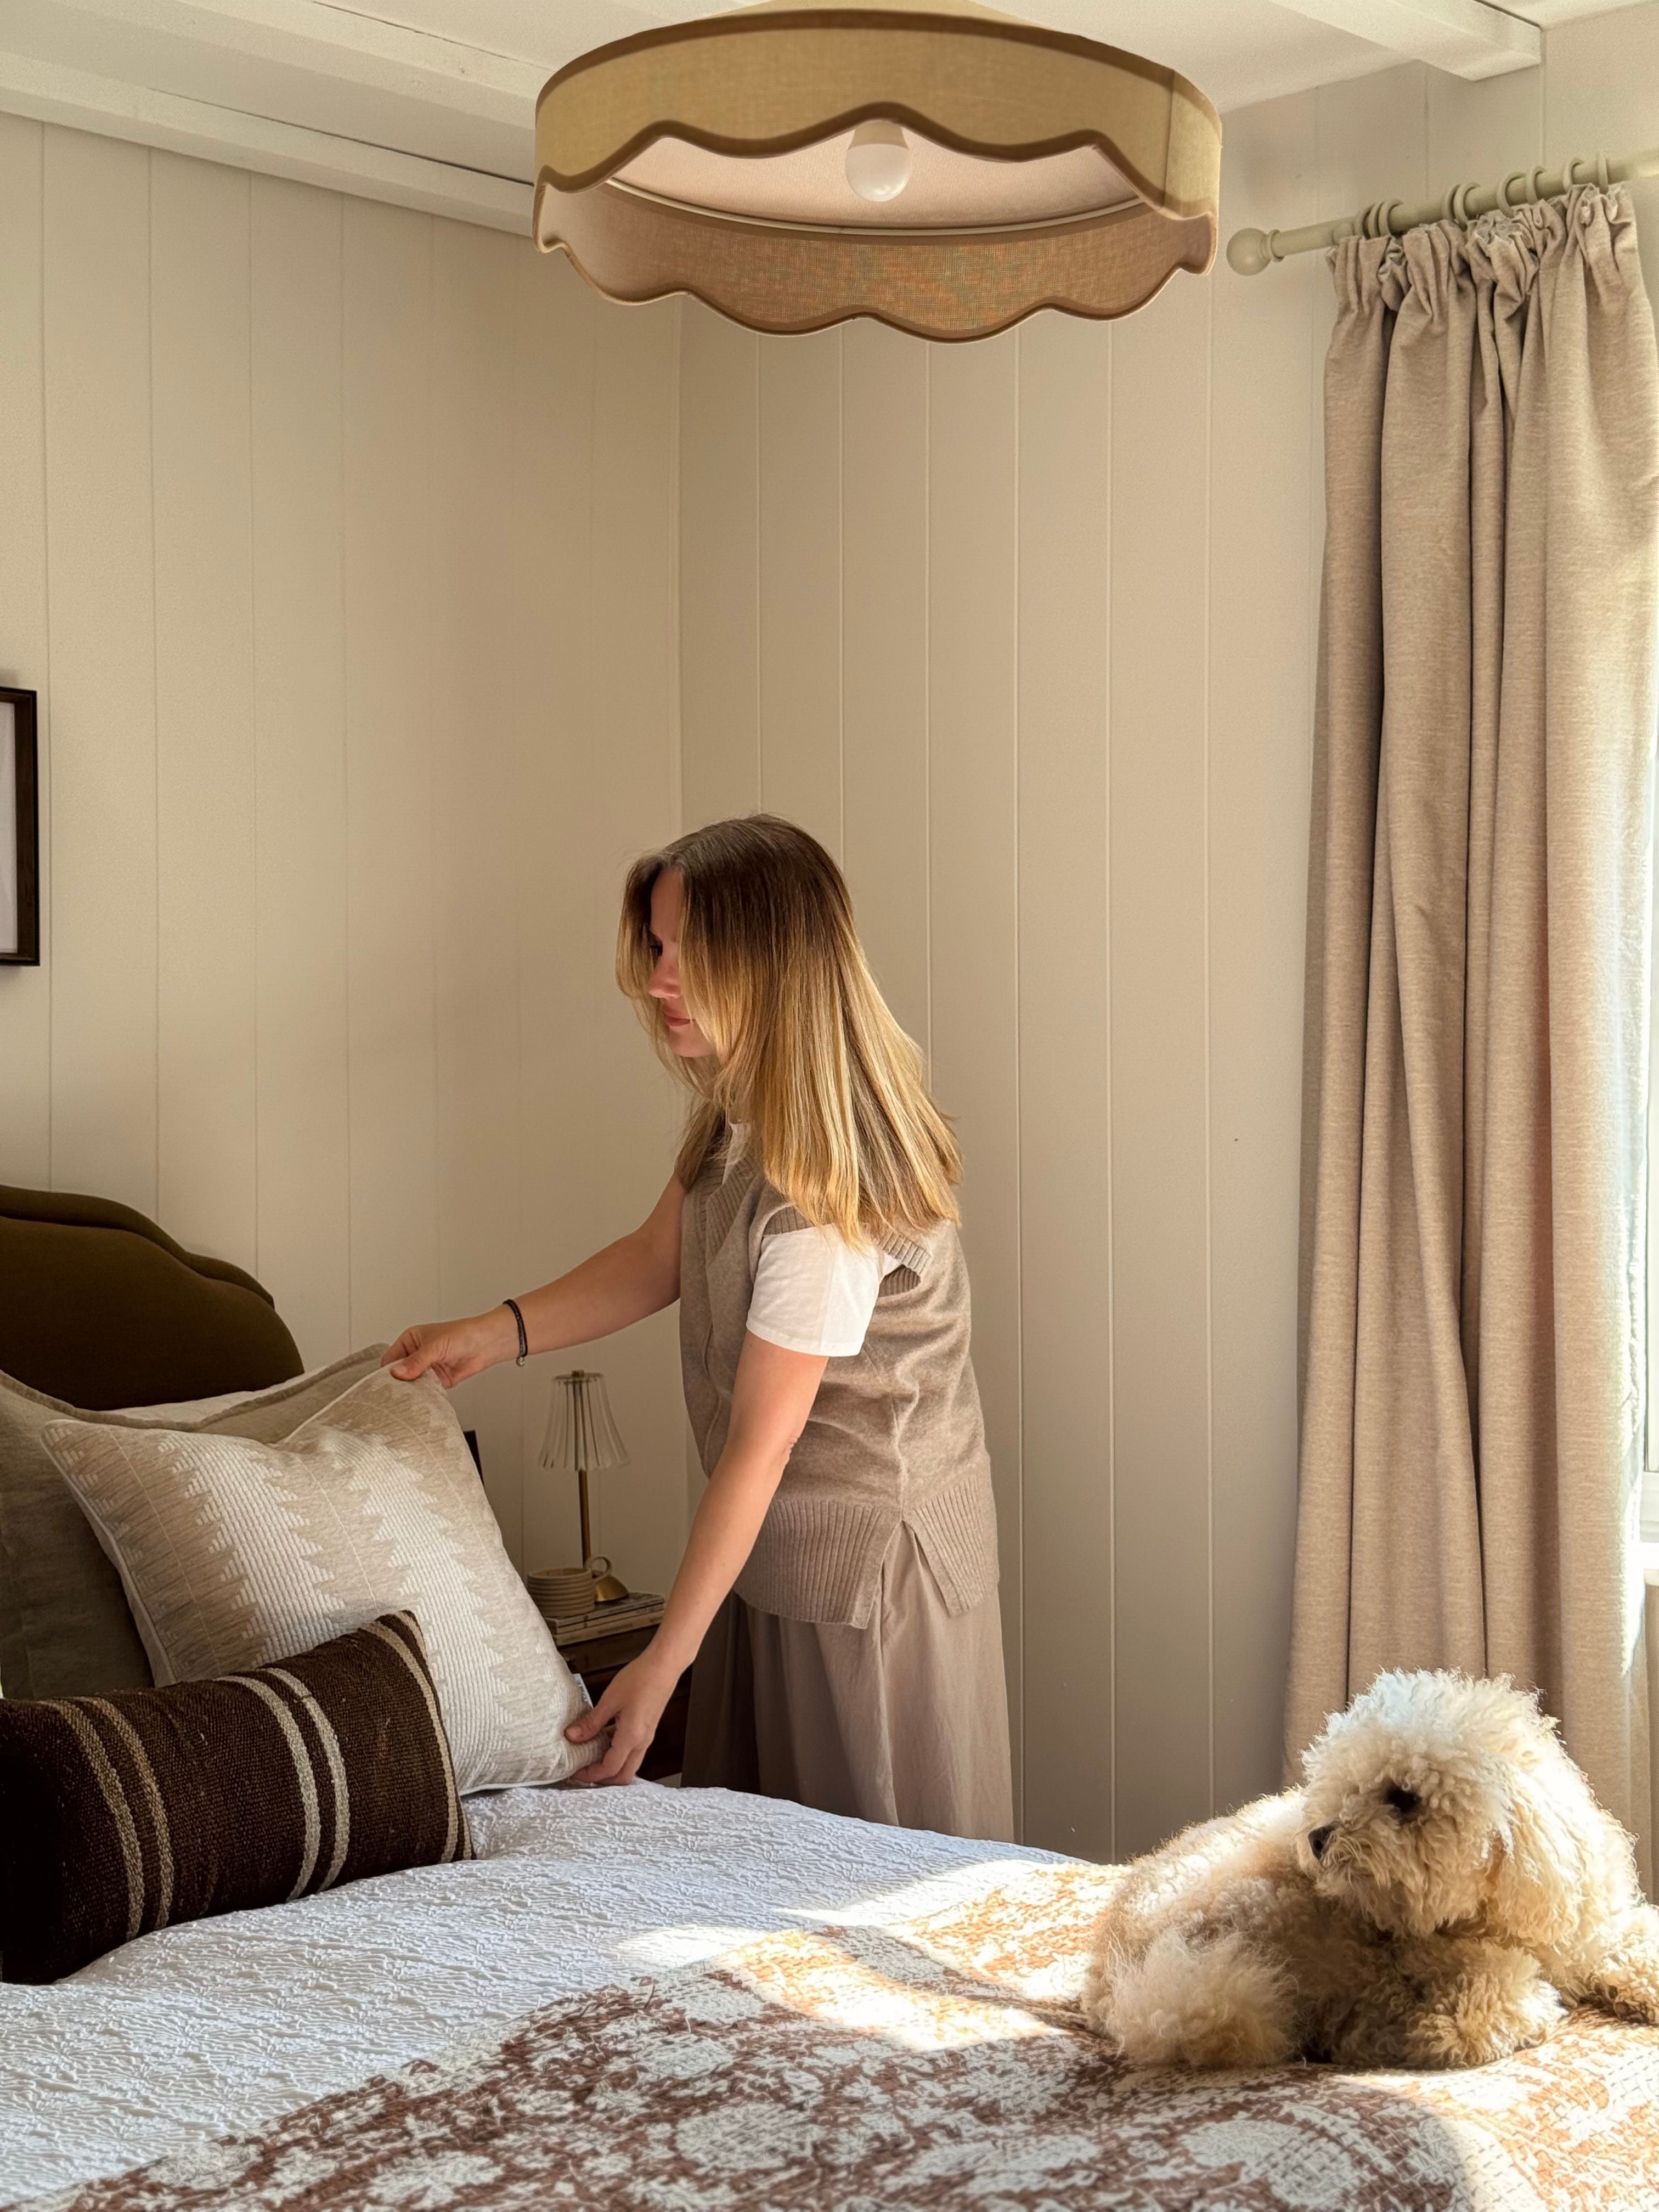
I feel so proud of it, and my husband (child and dog) absolutely adore it too. Terry worked so hard with me to get to competed and I’m so happy with how we tackled the project as a team. It’s gone from bland, boxy and tired to a room brimming with character. It feels fresh and modern, but also timeless and antiquified.
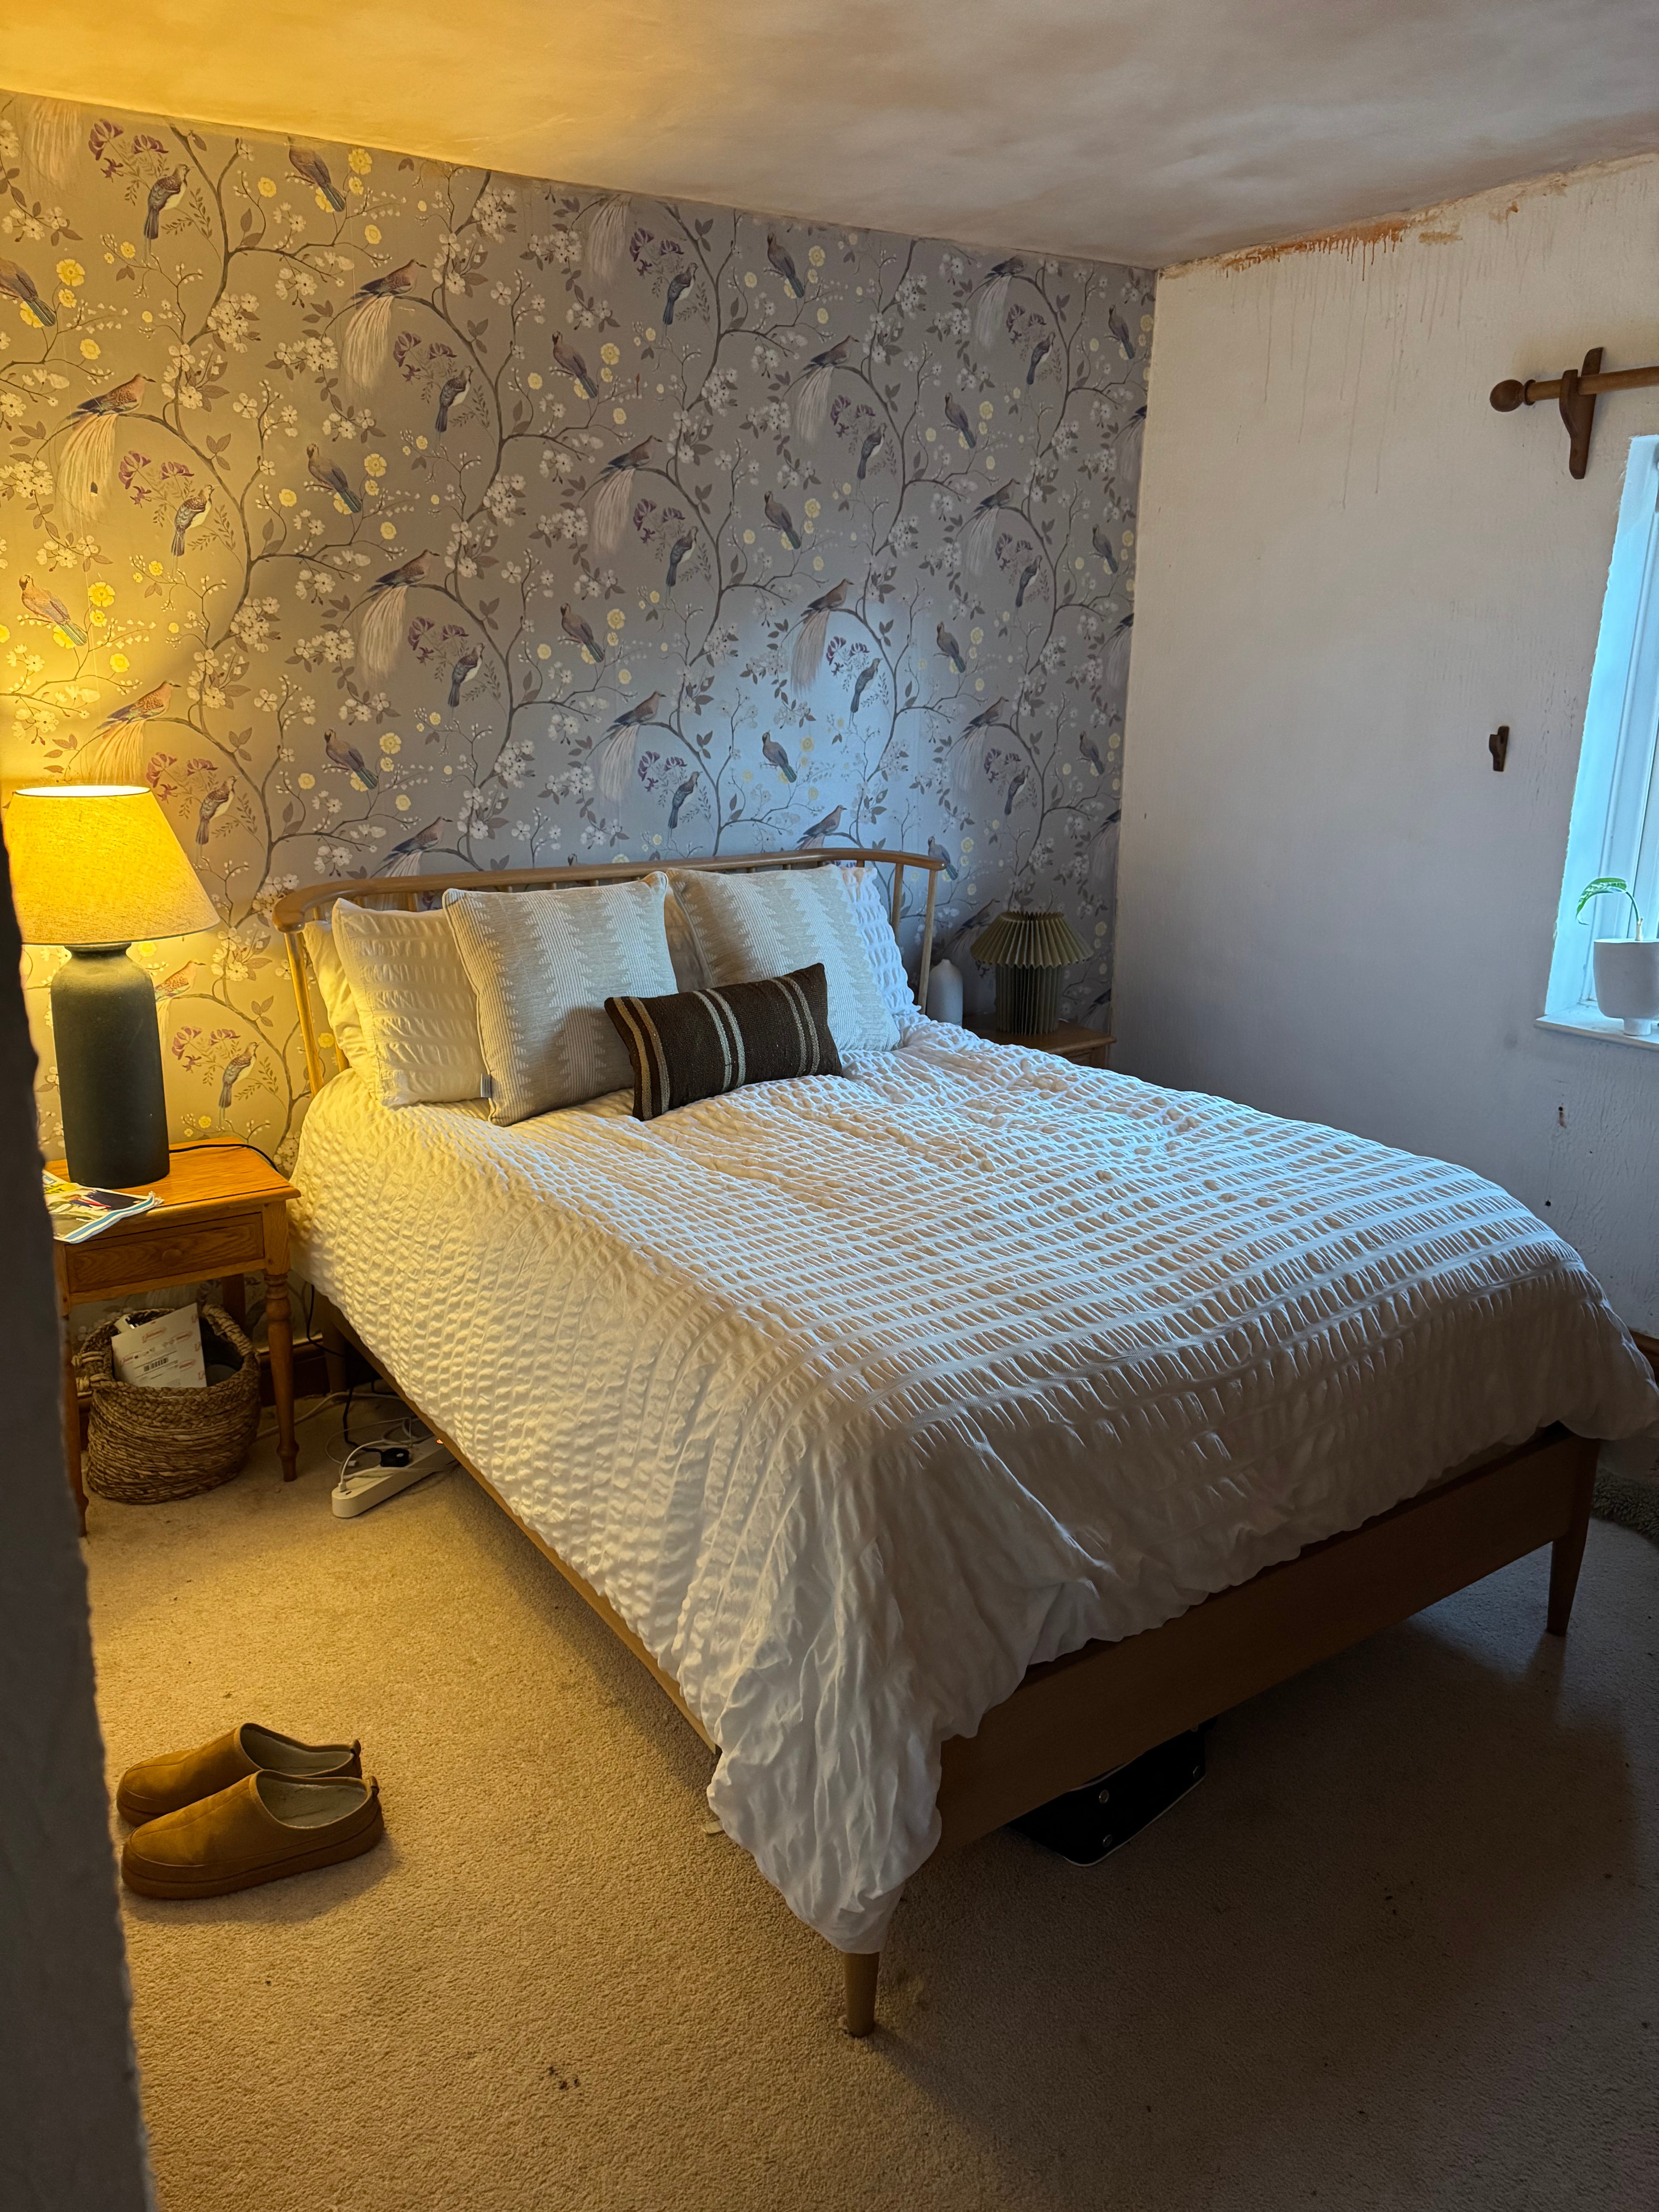
Let’s remind ourselves of how it looked before…
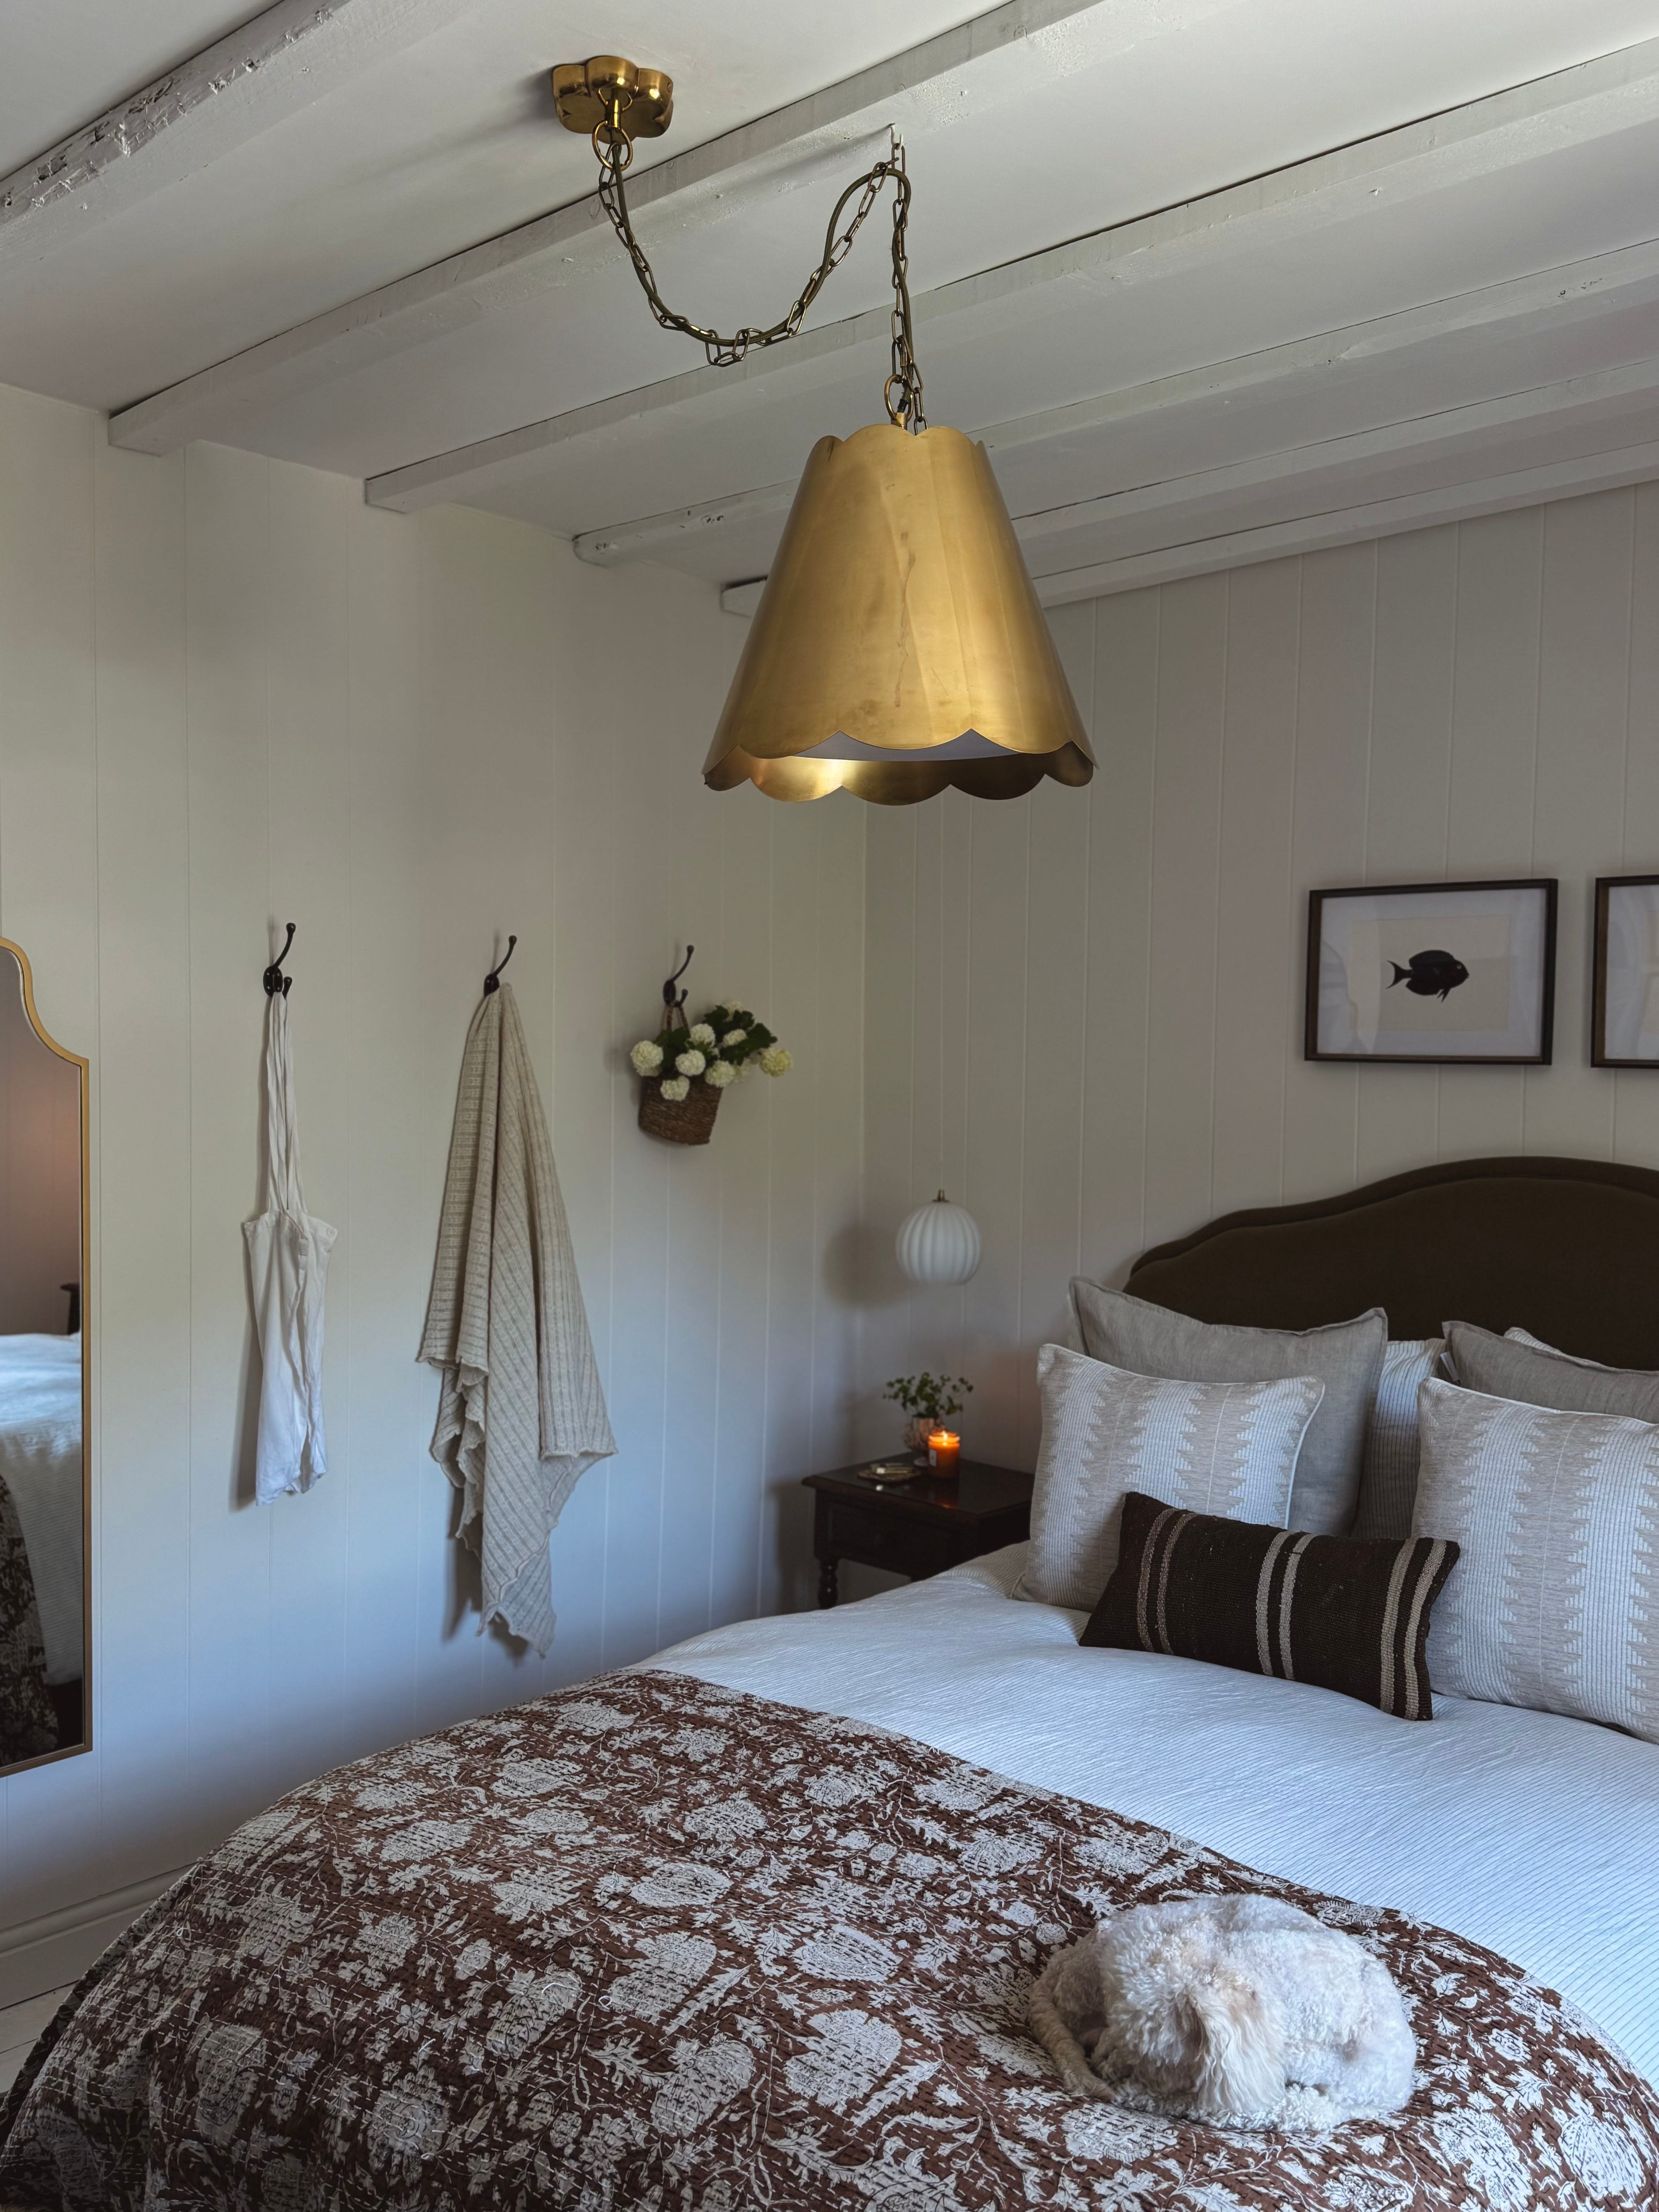
One of my biggest gripes with this room was the lack of period features, especially when compared to rooms in the downstairs space which mostly have beamed ceilings. As the walls were covered in artex, we had two choices; get them skimmed, or cover them. And cover them we did. That’s where Naturewall came in; and honestly using them has been one of the best decorating decisions I’ve ever made. If you haven’t heard of them, Naturewall essentially sell all different types of panelling; including kits, real wood and MDF products. We wanted to create a bit of a naughtic/ colonial vibe in our bedroom and decided to go for the wider MDF tongue and groove planks which come in pre-cut sheets. You then simply glue these on to the wall (using grab adhesive) and tack into place to support them whilst the glue ‘sets’.
The full height panels are 2.4 metres in length, which is about the average height of a ceiling in a UK home. Our cottage has *very* wonky walls so we had to trim the panels a bit- but that was the literally the only remotely ‘tricky’ part.
To ensure we had straight lines we used a spirit level and made sure to check once cutting before adding adhesive. Technically, you’re meant to use the panels on a flat, smooth surface but it covered over the artex with no issues whatsoever. It was dry and sturdy within hours-although we had to use a lot of tacks, purely because our old cottage walls are so uneven. In a new build, or on better walls, I’m sure you could skip this process and just glue!
Ceiling beams:
We used motorway fencing (M-WAY posts) from a timber yard to create ‘beams’ in our bedroom. We chose the ones with the most interest/ those which looked ‘oldest’ (although they aren’t reclaimed as we were trying to stick to a budget.)
It was around £60 for 13 pieces. We caulked around the edges and I painted them in Loft White by Little Greene; the same shade as the ceiling. I used emulsion as although wood, it’s purely decorative and I didn’t want anything with a sheen. I wasn’t too precious about a very even coverage as purposely wanted the gnarlier bits of the wood to stay exposed.
Wall colour and floor:
I used Little Greene Intelligent Eggshell on the walls and skirting board, which is an outstanding product. It is essentially an emulsion paint, but with the hardwearing properties of an eggshell and is completely washable meaning it can be used on woodwork, and even radiators.
I knew I wanted to bring back my love of lighter, brighter walls in this space after my well documented disdain for the blue in the living room and I am SO glad I went with my gut. I know many find it boring, but I just love an white/off white wall; especially when contrasted with darker/ moodier accents. It feels fresh but has depth and interest so you kind of get the best of both worlds!
After testing a few colours, I went with Linen Wash (also by Little Greene) which is a really gentle, off white which as its name suggests; evokes the hue of a natural, raw linen. Loft White is the shade the brand recommend pairing it with, and there’s *just* enough of a difference to highlight the slightly darker wall colour. It is stunning. I absolutely love the palette, finish and how it feels in here.
I also painted the floorboards (after ripping up in the very dishevelled carpet early on into the project) in Loft White to mirror the ceiling.
Furniture:
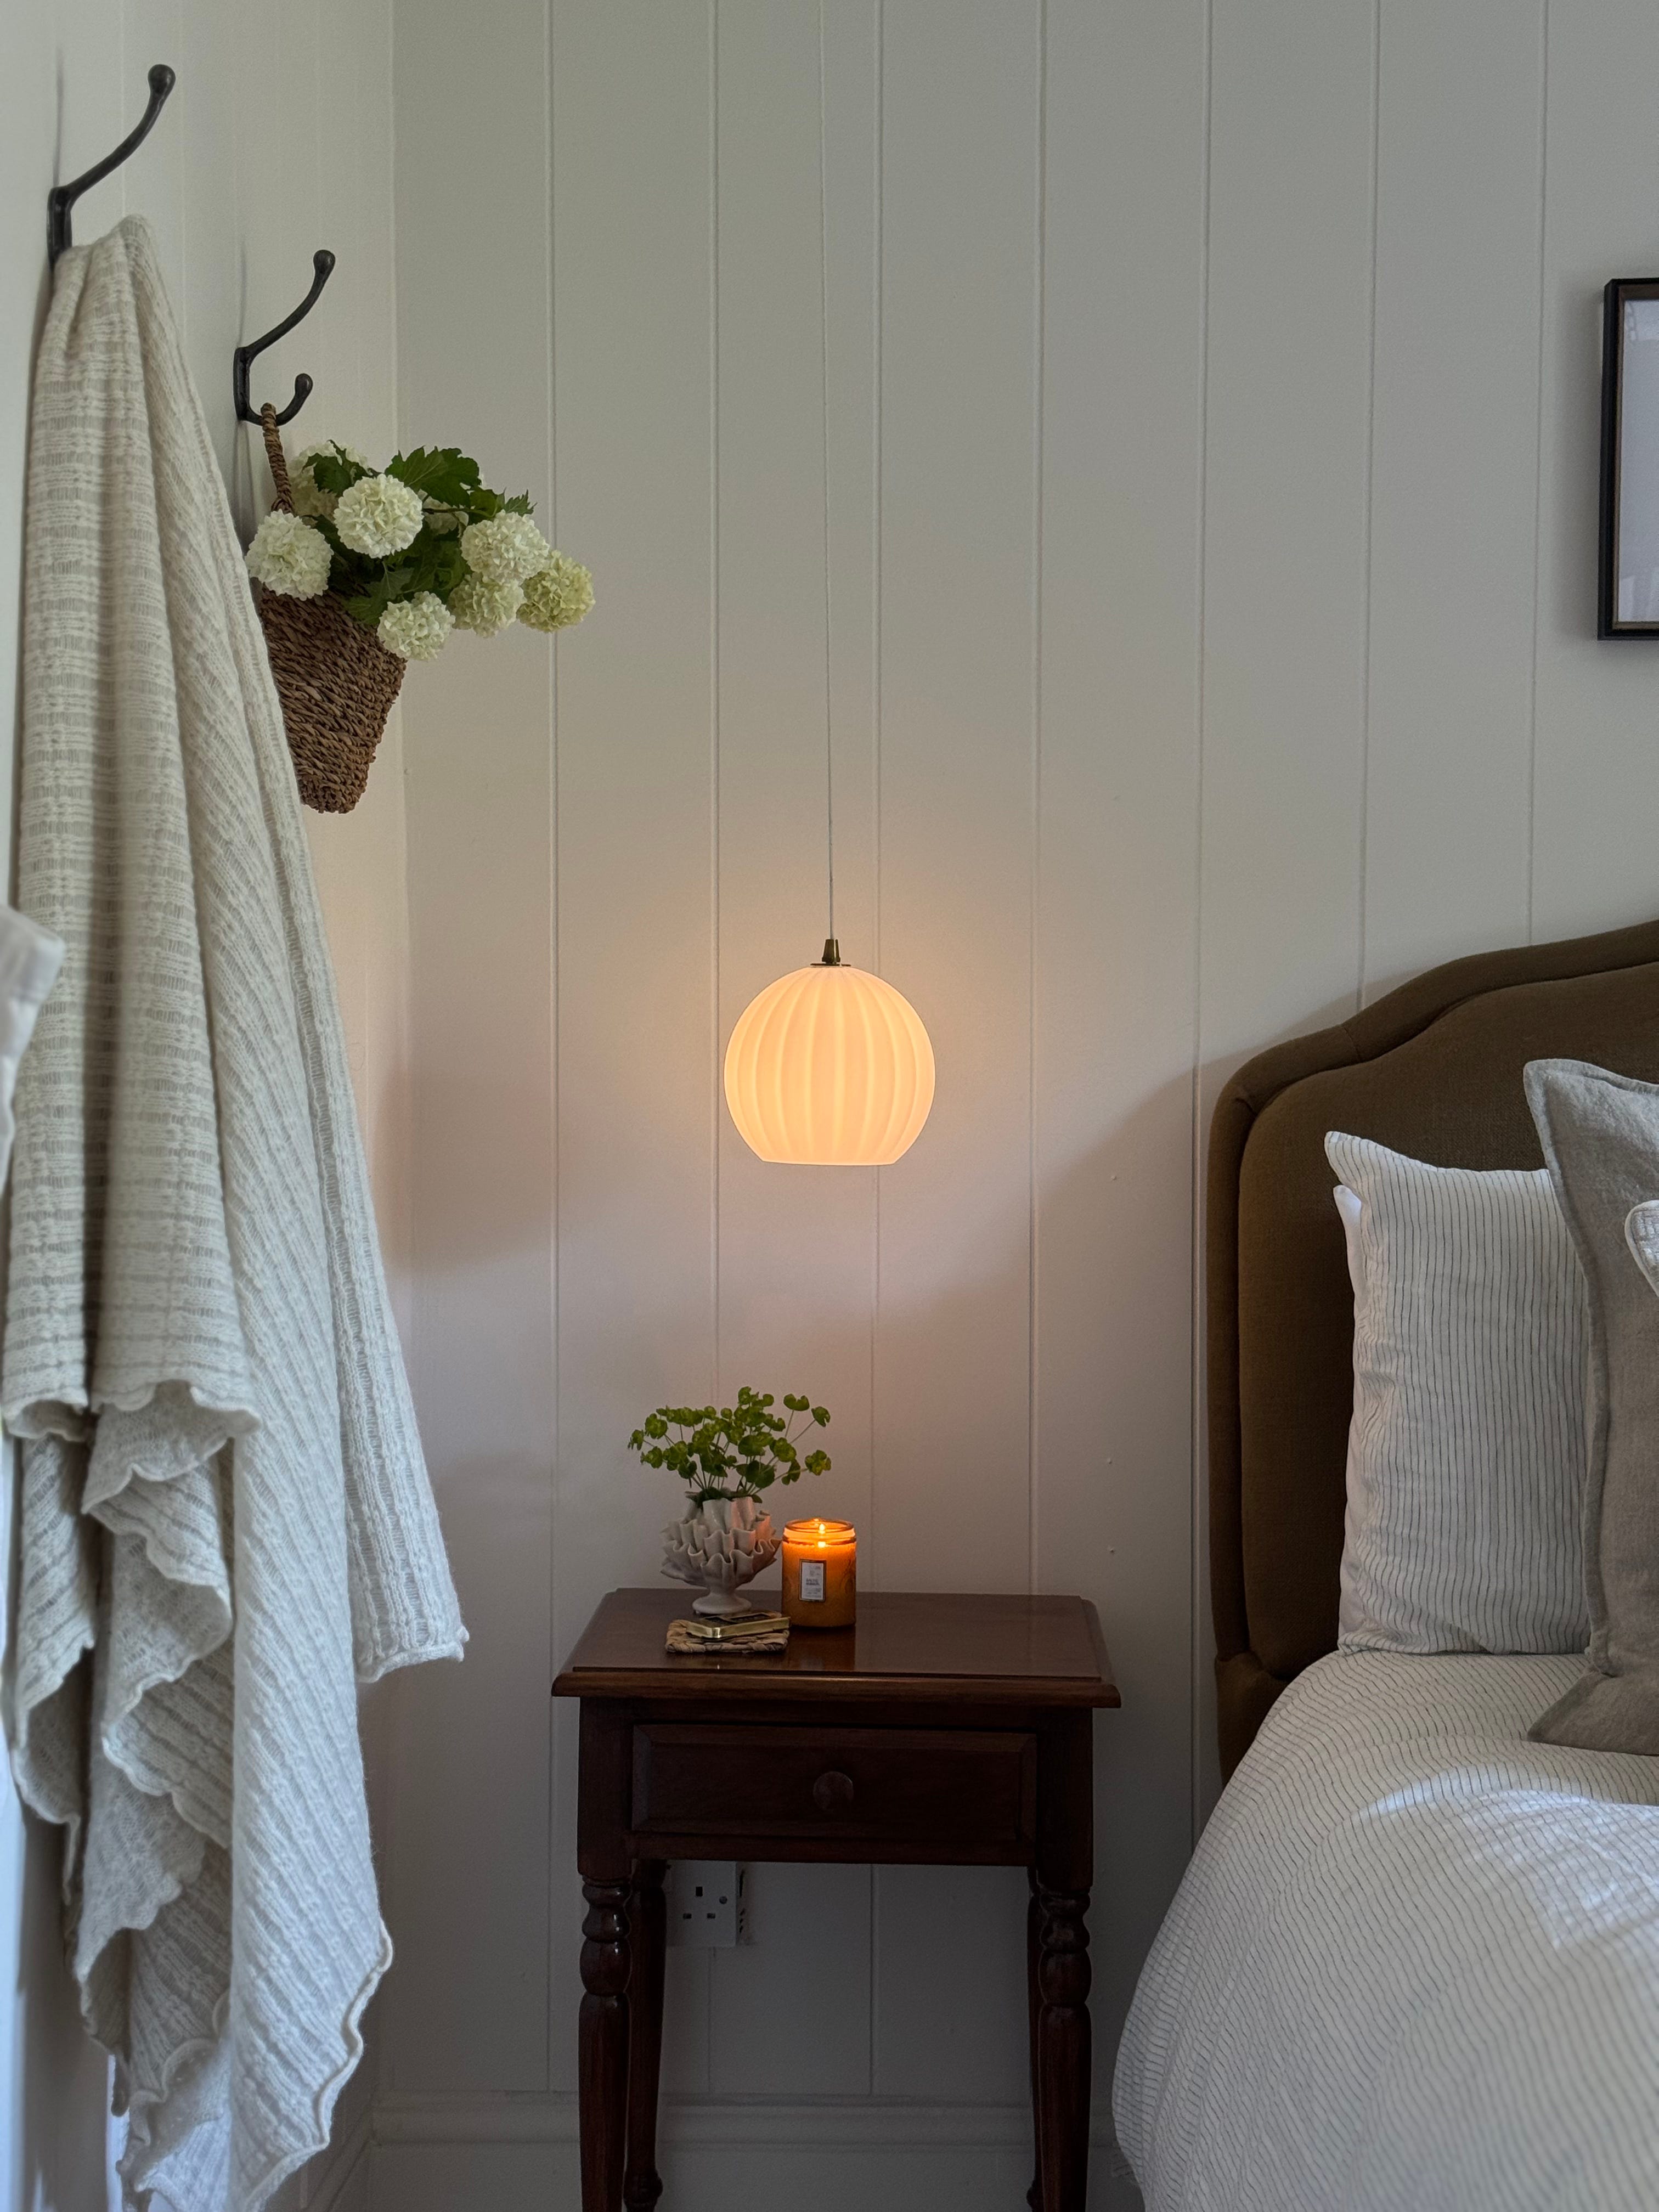
I was thrilled to find the majority of our furniture on Ebay, including these lovely bedside tables. They were/are in perfect condition and are of excellent quality. They are the perfect size, shape and style for this room. They were slightly orangey in tone; possibly due to age or wear so I simply stained them a little darker to match the chest of drawers (which you can see in other images.) We paid £30 for the two which has to be the bargain of the century because they are clearly very well made.
I was fortunate to work with Loaf on the bedroom, a brand I love, and receive the Sugar Puff bed-a piece I have admired for ages. It’s a French Bed, but with a twist. If you’re like me, and love a classic shape but also admire a more contemporary feel I think you’ll really like this too. And the colour! Just WOW. It is so unusual-sort of a brownish, greeny, sludgy hue. It’s dreamy. And soooo comfortable.
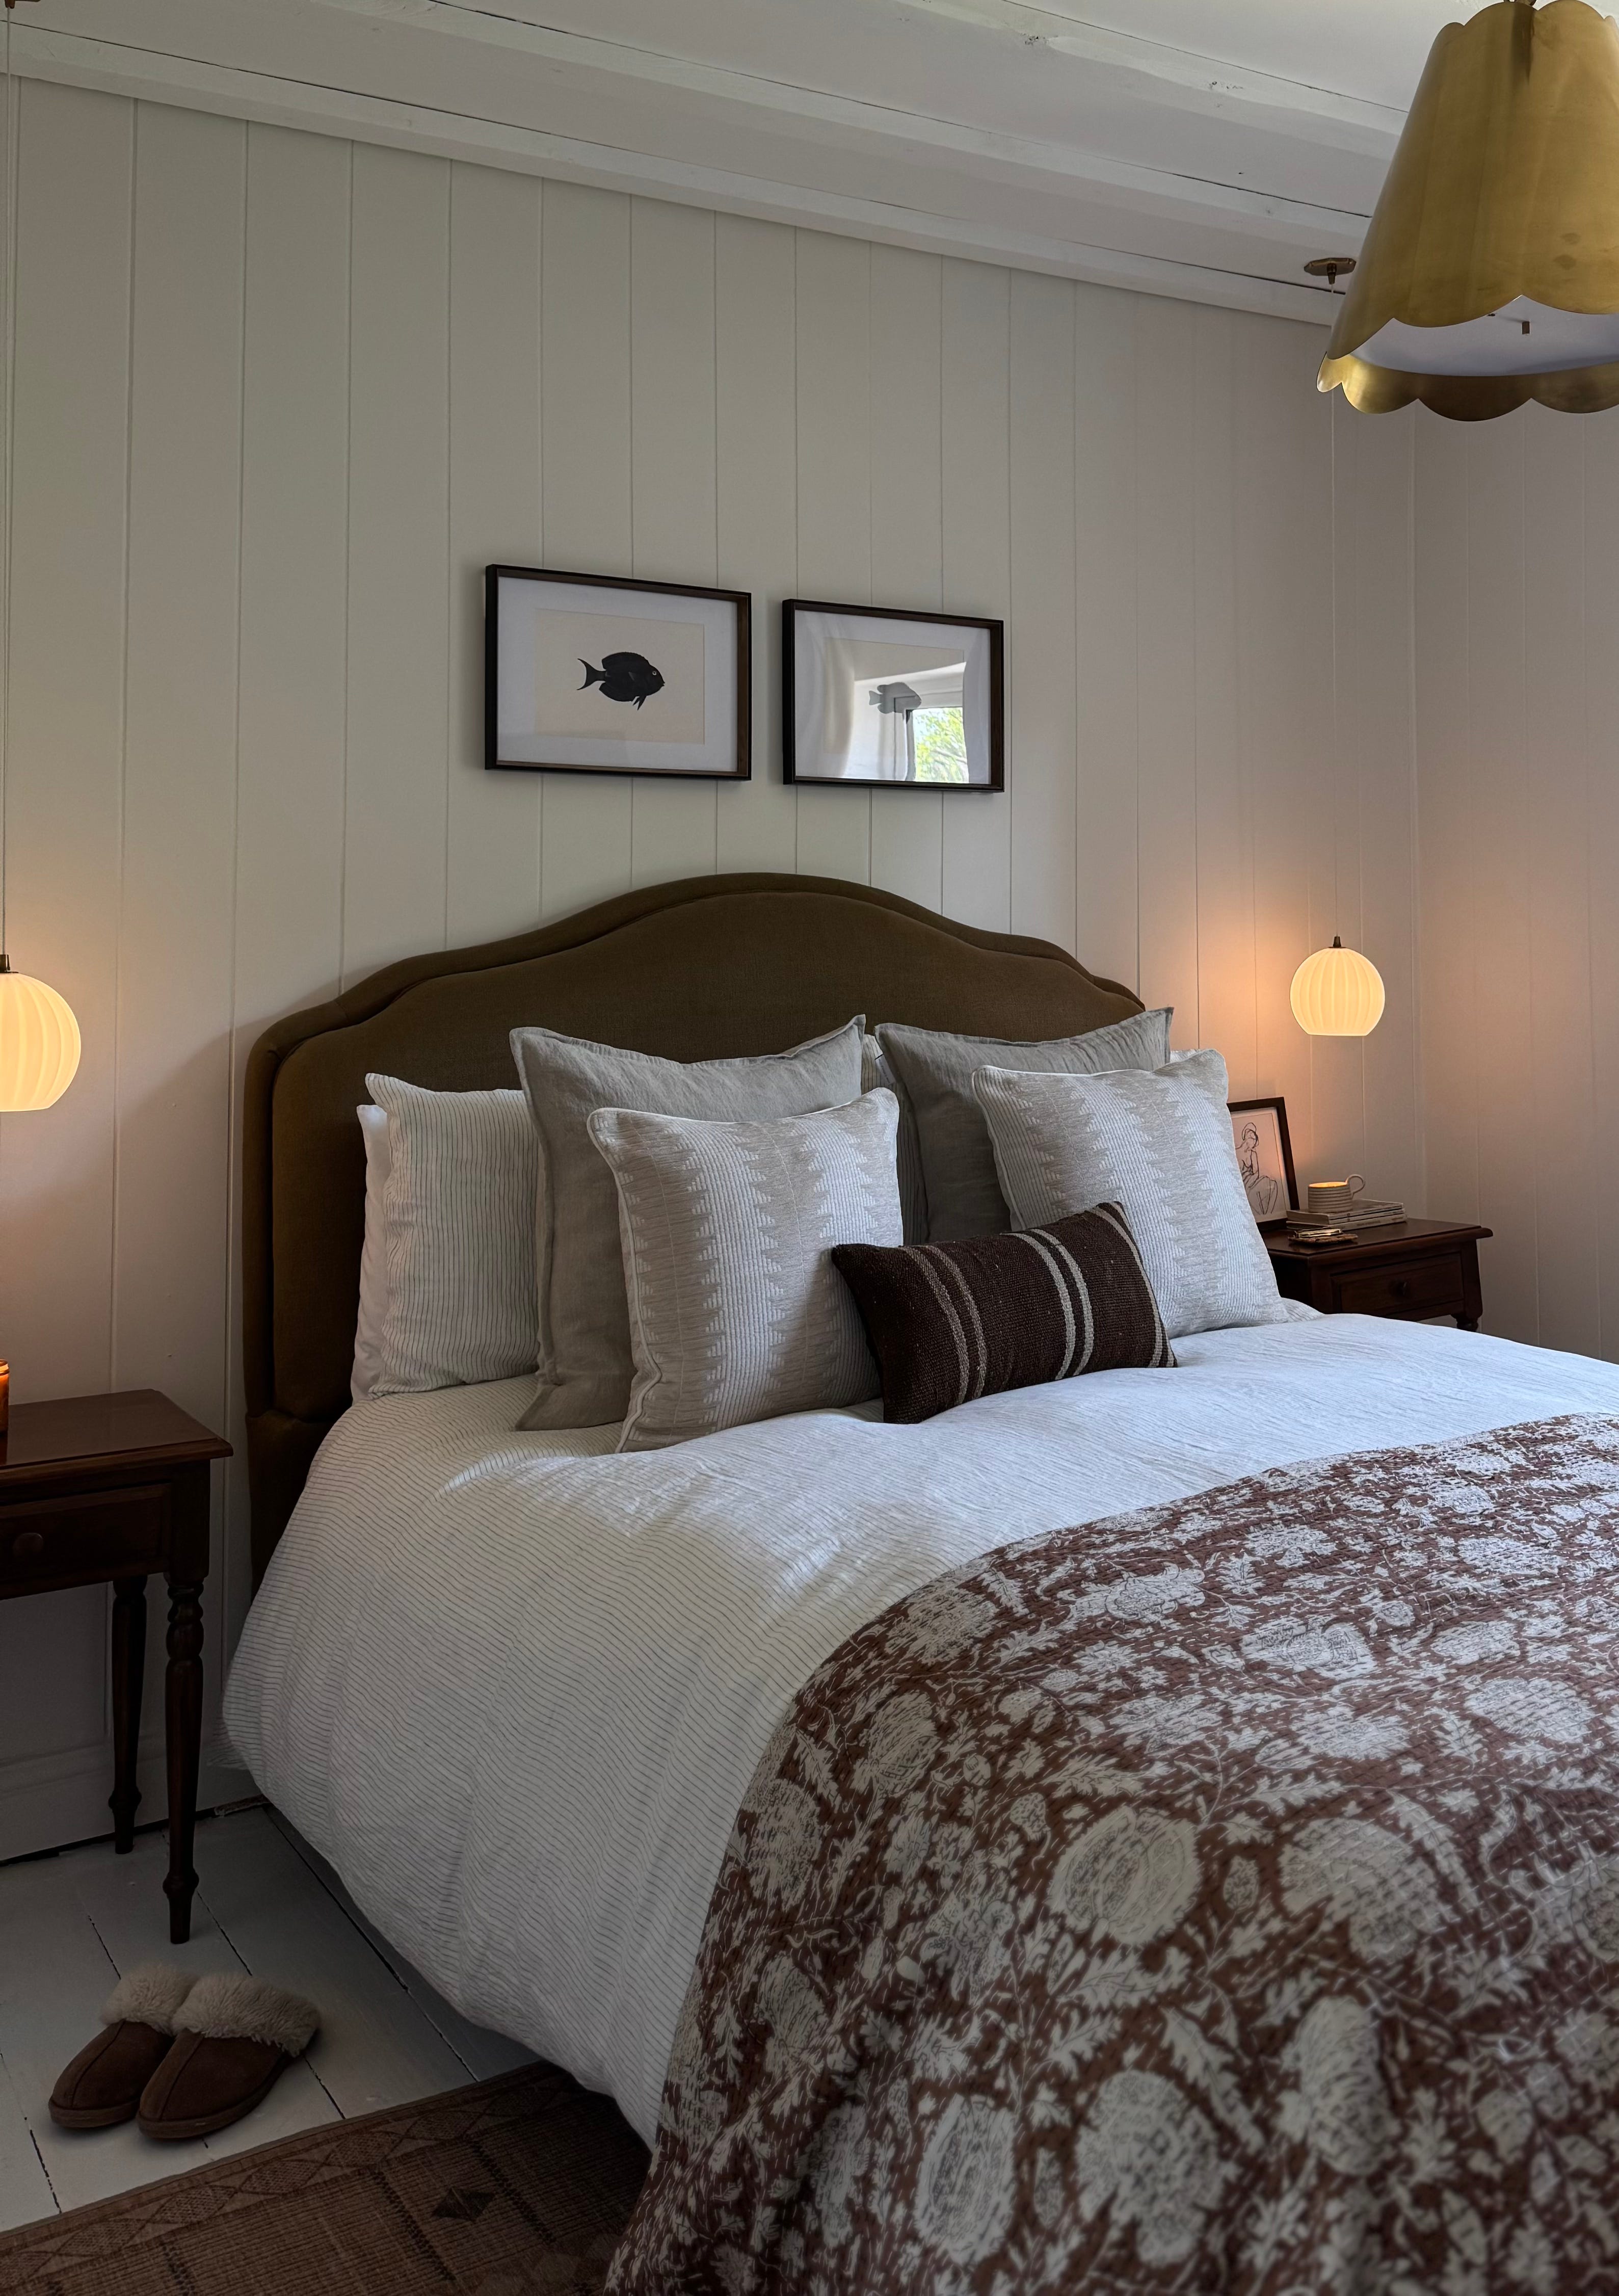
Gallery wall:
Something I wrote about in my planning post was how we love to watch telly in bed (zero shame here) but wanted to minimise the look of ours. Our budget wouldn’t stretch to a frame TV so we opted to keep our current telly but popped it onto a thinner bracket and then surrounded it in art.
(BTW: Next week’s post will focus on this hack and how we did it so make sure to follow along!)
Curtains:
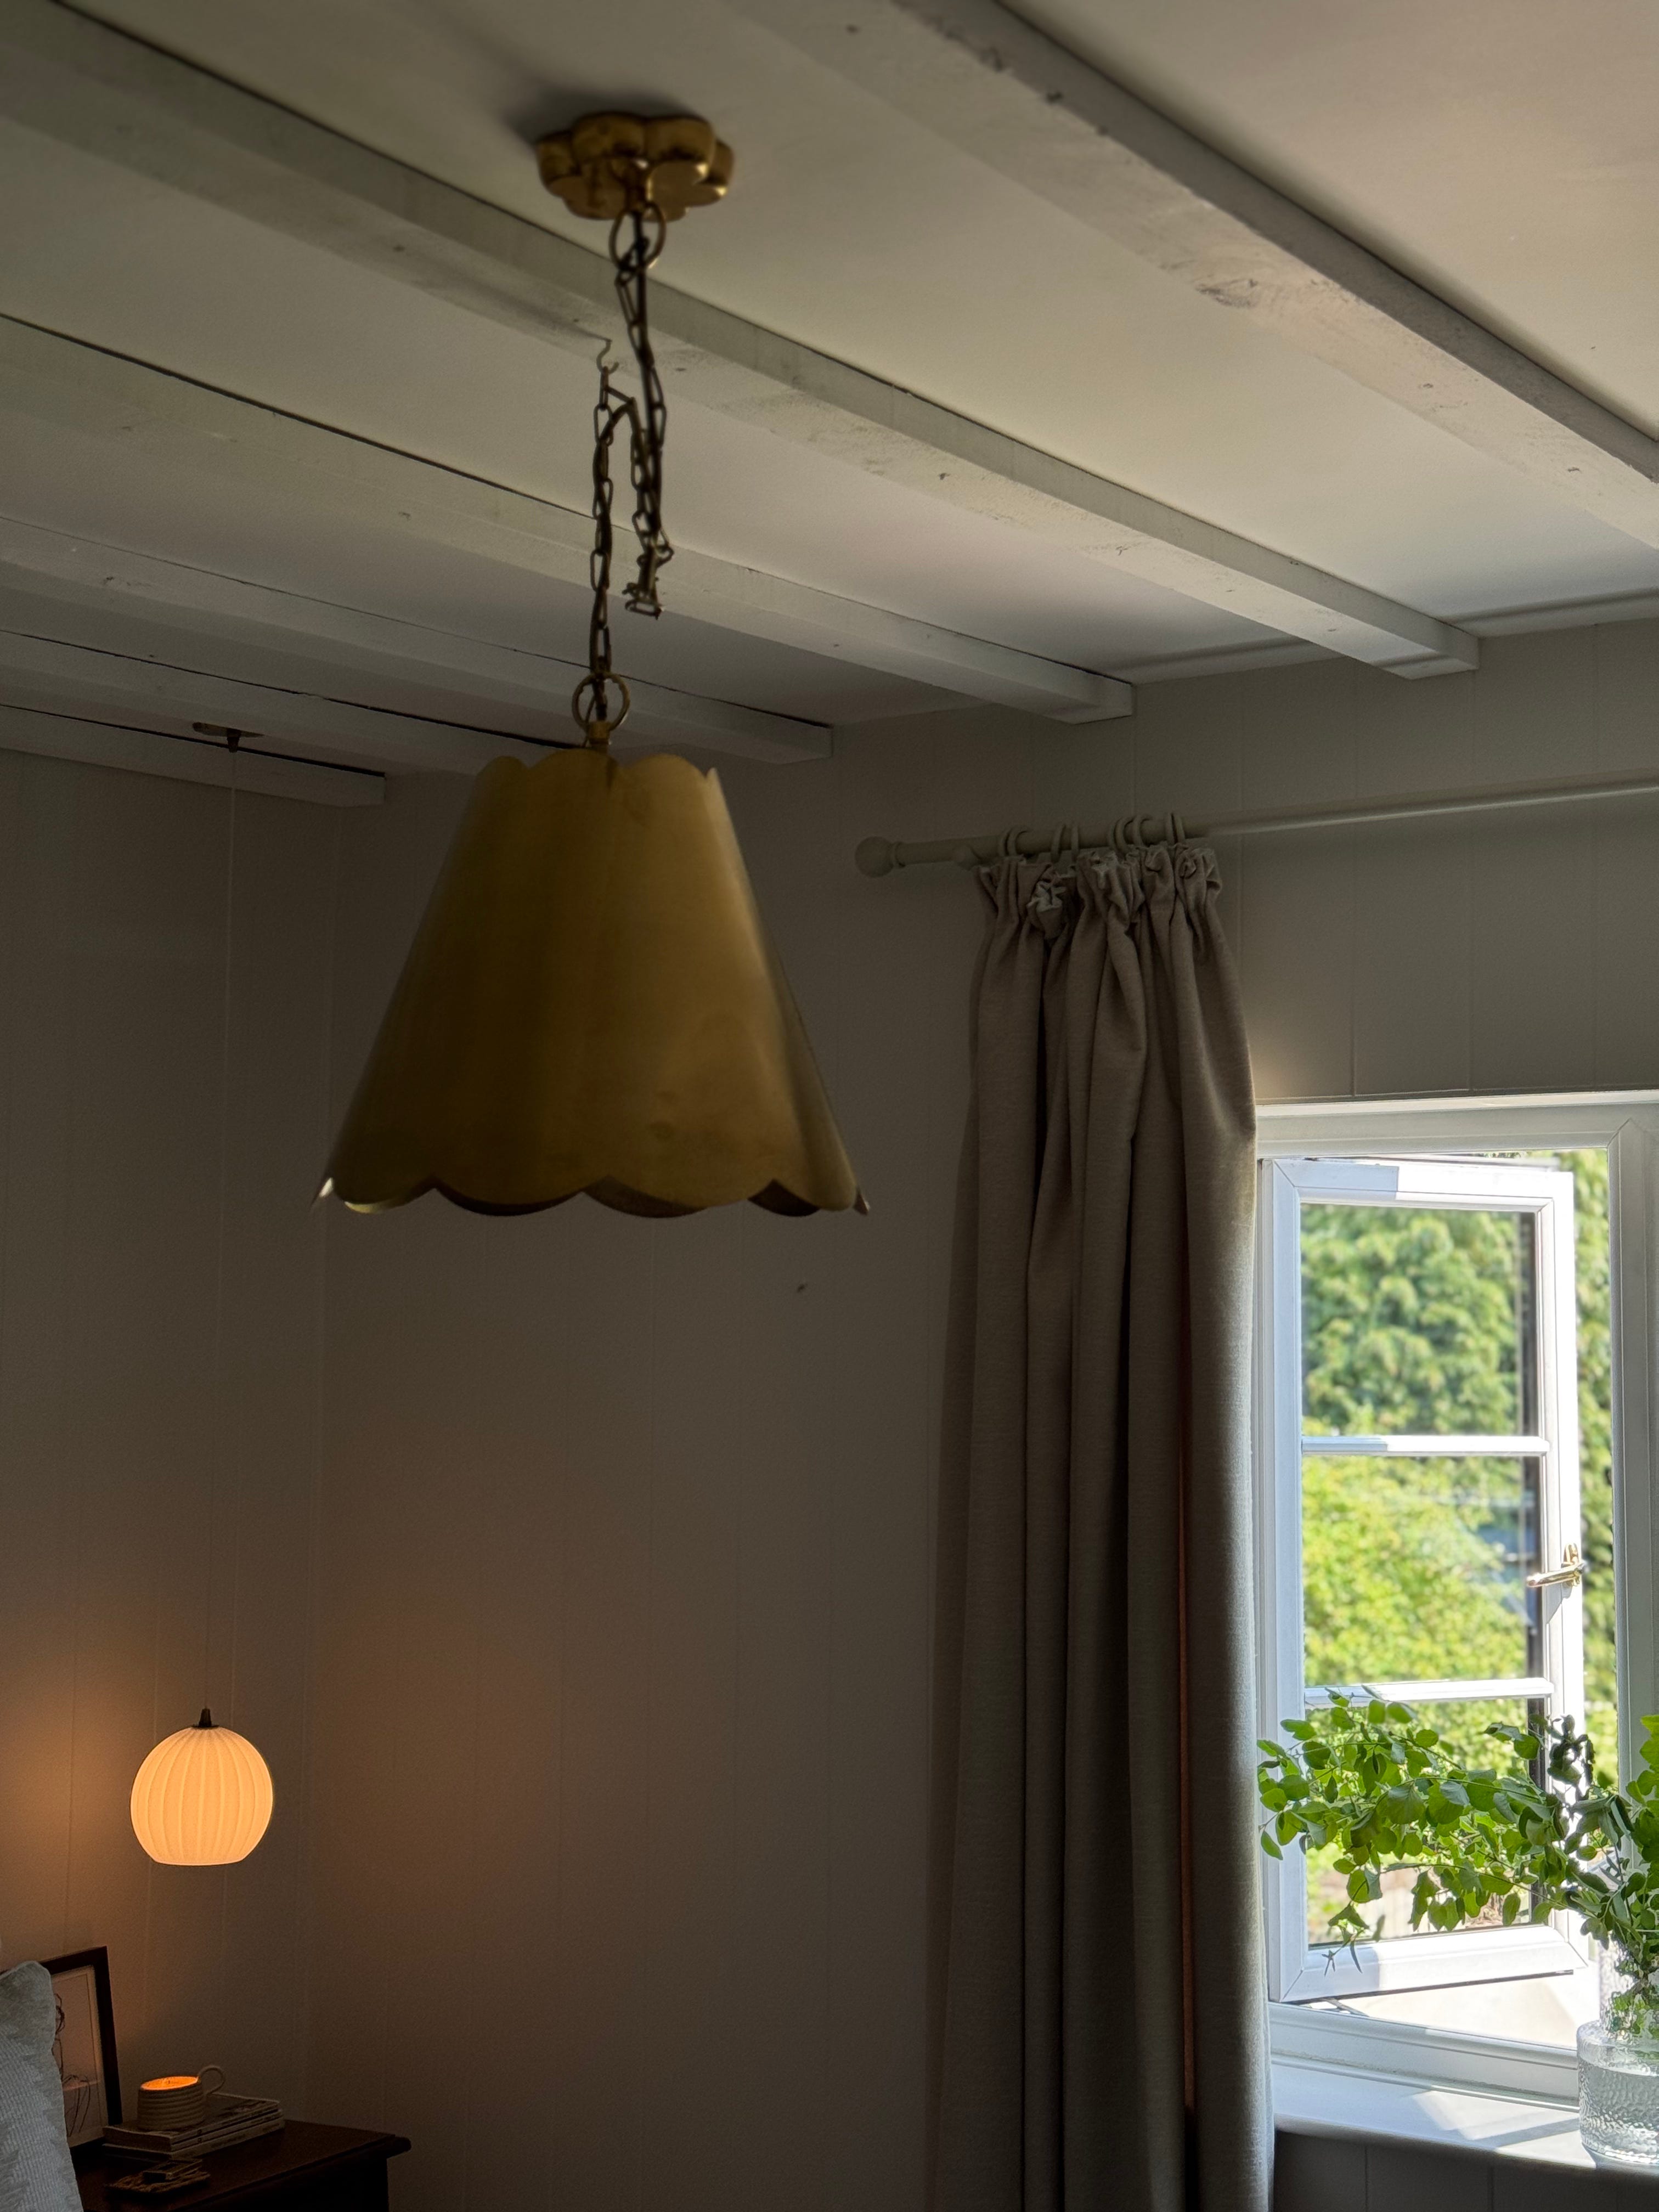
I bought these linen effect curtains from Dunelm. they are lined and really well priced. they lean ever so slightly grey (rather controversially, I love grey and won’t be told otherwise.) but I like that I have mixed lots of neutral, both warm and cool in here-I think it adds dimension.
Lighting:
I was super lucky to work with Pooky on this project and opted for their rechargeable pendant lights for over our bedside tables because I wanted to keep the surfaces of them as clutter free as possible. I’ve never used pendants in this way before and I must say I am a convert. Such a genius product whereby you can completely customise your lighting, and obviously fantastic if you haven’t accounted for electrics in your space (which we hadn’t.) I love how they frame the bed-they are so delicate and pretty…
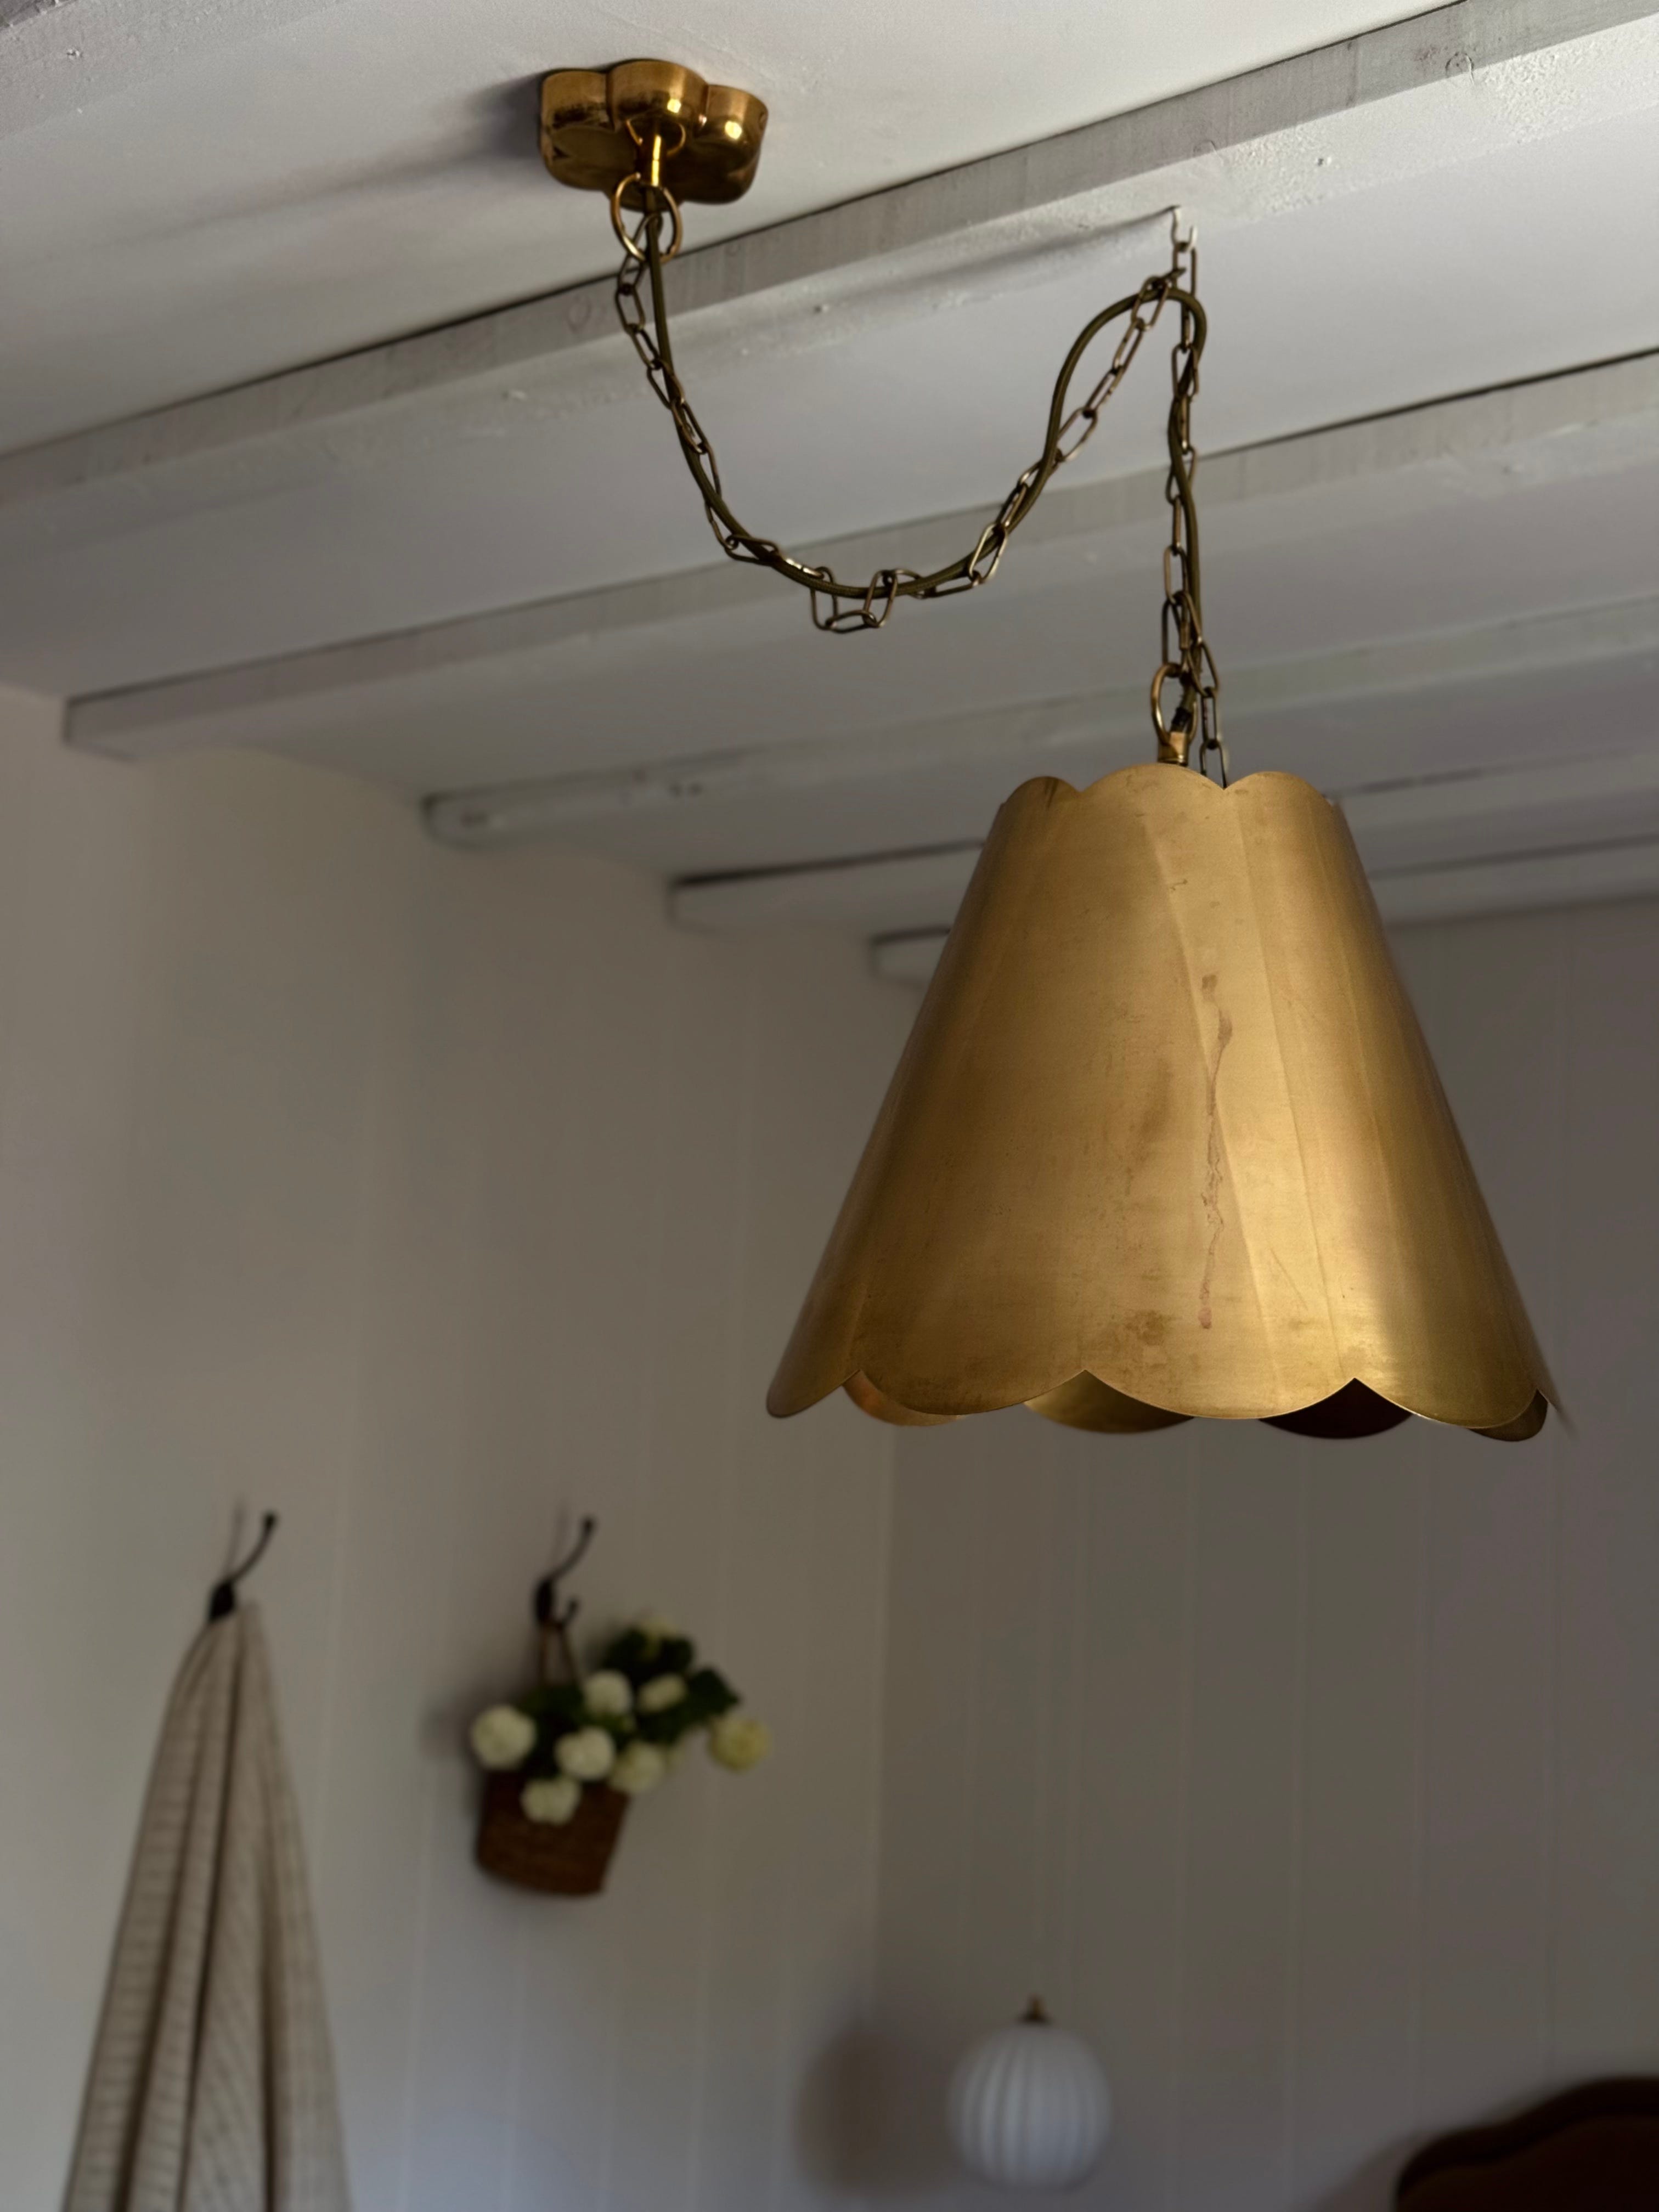
…and the bold Dolly hardwired pendant for the centre!? I’ve never seen anything so BEAUTIFUL. I really like the patina, and how much of a statement it makes. I usually detest the big light being on but I’ll make an exception in this case as it’s just so flippin’ lovely!
SO with the bedroom done, it’s now time for my next project! I wrote about my plans here, and will be sharing the full process on my socials over the next few weeks-so make sure to follow me over on the gram so you don’t miss out….
Until next week,
Nina x
Your new master bedroom is so so beautiful. Timeless, unique and very characterful. You have done so well, I love your style.